Tag: hosting

  • Hetzner dedicated server setup

    Dedicated Server

    I have a dedicated server now, from Hetzner. My old one was getting kinda crammed, and I realized that a “cloud based” server would be massively smaller at the same price – so I have now “invested” in a proper and totally oversized dedicated server.

    The goal: To host my services on it, this time using k8s and all the shiny best-practice tools we have available now. No more fiddling around. Also, no more things that can go “meh”, I spent way too much time reigning my old server back in.

    Server installation

    First of all, i basically followed this document.

    • check for RAID controllers (lspci | grep -i raid)
    • i had none, great, software RAID it is
    • wipe hard drive boot sectors, just in case (wipefs -fa /dev/nvme*n1)
    • exec installimage

    Now the question of questions – which OS? Debian, Ubuntu, or Arch Linux?

    • Debian: Rock solid, a bit dusty, rock solid, supported everywhere.
    • Ubuntu: Most popular, annoying commercial stunts, supported also everywhere.
    • Arch Linux: Least supported, most cool.

    Arch it is? … Hm, let’s opt for “rock solid”. Autoupdate should be a given (it is with Debian), so … yeah. Debian. (sadface, a bit, but still – Debian)

    An unreadable editor opens. (lightgray on lightblue? srsly??)

    Some really serious questions though.

    File system & RAID

    BTRFS? But … on top of software RAID? Or “native” BTRFS-RAID? Conveniently, the Hetzner installation script uses mdadm based RAID by default, so this is what I’m going to use.

    Regarding the file system, some research lead to …

    • don’t do BTRFS on top of SW RAID (which Hetzner is kindly setting up for me, so no BTRFS it si then), and
    • ext4 and XFS “meh”, really not much difference.

    Regarding layout, …

    • I thought long and hard and realize the only question is: Do I want to re-install on hard drive failure, or not?

    … and I don’t. So RAID 1 (“mirroring”), no LVM (because yeah, sure, i could extend transparently, but … gooood get on with it already, and KEEP IT SIMPLE!!).

    So, software-based RAID 1 (mdadm), ext4 filesystem, go.

    ##  Hetzner Online GmbH - installimage - standard config
    
    ##  HARD DISK DRIVE(S):
    DRIVE1 /dev/nvme0n1
    DRIVE2 /dev/nvme1n1
    
    ##  SOFTWARE RAID:
    # activate software RAID?  < 0 | 1 >
    SWRAID 1
    # Choose the level for the software RAID < 0 | 1 | 10 >
    SWRAIDLEVEL 1
    
    ##  HOSTNAME:
    HOSTNAME fly3
    
    ##  NETWORK CONFIG:
    # IPV4_ONLY no
    
    ##  MISC CONFIG:
    USE_KERNEL_MODE_SETTING no
    
    ##  PARTITIONS / FILESYSTEMS:
    PART swap   swap       32G
    PART /boot  ext4     1024M
    PART /      ext4       all
    
    ## your system has the following devices:
    # Disk /dev/nvme0n1: 512.12 GB (=> 476.94 GiB)
    # Disk /dev/nvme1n1: 512.12 GB (=> 476.94 GiB)
    
    ## Based on your disks and which RAID level you will choose you have
    ## the following free space to allocate (in GiB):
    # RAID  0: ~952
    # RAID  1: ~476
    
    ##  OPERATING SYSTEM IMAGE:
    IMAGE /root/.oldroot/nfs/install/../images/Debian-1205-bookworm-amd64-base.tar.gz
    

    The nice thing: If you “just do” and don’t think, the whole process it’s going to take you less than 10 minutes.

    K3S installation

    Well, for installing k3s (the k8s distribution of choice) there are were two valid options:

    Decisions, decisions, again. I did for v2 of my server, so that sounded like a no-brainer option. But I had a look at the ansible roles, and I thought “do I really need this?” … and the answer is – no. The only thing I want are managed upgrades, and this is possible either with ansible, or – cloud native 😁 – using a K8S Operator, namely Rancher’s system-upgrade-controller.

    So I am about to try k3sup, which should give me the most simple K8S cluster there is.

    Let’s go:

    k3sup \
        install
        --cluster \
        --host $HOST_IP \
        --merge \
        --user root \
        --ssh-key $HOME/.ssh/id_ed25519
    

    It’s a bit annoying that you have to actually specify your SSH private key if you don’t use RSA, but hey – otherwise it worked like a charm.

    Running: k3sup install
    2024/06/01 13:46:24 fly3.srv.flypenguin.de
    Public IP: <host-ip>
    [INFO]  Finding release for channel stable
    [INFO]  Using v1.29.5+k3s1 as release
    [INFO]  Downloading hash https://github.com/k3s-io/k3s/releases/download/v1.29.5+k3s1/sha256sum-amd64.txt
    [INFO]  Downloading binary https://github.com/k3s-io/k3s/releases/download/v1.29.5+k3s1/k3s
    [INFO]  Verifying binary download
    [INFO]  Installing k3s to /usr/local/bin/k3s
    [INFO]  Skipping installation of SELinux RPM
    [INFO]  Creating /usr/local/bin/kubectl symlink to k3s
    [INFO]  Creating /usr/local/bin/crictl symlink to k3s
    [INFO]  Creating /usr/local/bin/ctr symlink to k3s
    [INFO]  Creating killall script /usr/local/bin/k3s-killall.sh
    [INFO]  Creating uninstall script /usr/local/bin/k3s-uninstall.sh
    [INFO]  env: Creating environment file /etc/systemd/system/k3s.service.env
    [INFO]  systemd: Creating service file /etc/systemd/system/k3s.service
    [INFO]  systemd: Enabling k3s unit
    Created symlink /etc/systemd/system/multi-user.target.wants/k3s.service → /etc/systemd/system/k3s.service.
    [INFO]  systemd: Starting k3s
    Result: [INFO]  Finding release for channel stable
    [INFO]  Using v1.29.5+k3s1 as release
    [INFO]  Downloading hash https://github.com/k3s-io/k3s/releases/download/v1.29.5+k3s1/sha256sum-amd64.txt
    [INFO]  Downloading binary https://github.com/k3s-io/k3s/releases/download/v1.29.5+k3s1/k3s
    [INFO]  Verifying binary download
    [INFO]  Installing k3s to /usr/local/bin/k3s
    [INFO]  Skipping installation of SELinux RPM
    [INFO]  Creating /usr/local/bin/kubectl symlink to k3s
    [INFO]  Creating /usr/local/bin/crictl symlink to k3s
    [INFO]  Creating /usr/local/bin/ctr symlink to k3s
    [INFO]  Creating killall script /usr/local/bin/k3s-killall.sh
    [INFO]  Creating uninstall script /usr/local/bin/k3s-uninstall.sh
    [INFO]  env: Creating environment file /etc/systemd/system/k3s.service.env
    [INFO]  systemd: Creating service file /etc/systemd/system/k3s.service
    [INFO]  systemd: Enabling k3s unit
    [INFO]  systemd: Starting k3s
     Created symlink /etc/systemd/system/multi-user.target.wants/k3s.service → /etc/systemd/system/k3s.service.
    
    Merging config into file: /Users/tm/Dev/private/tf-spaghetti/kubeconfig
    Saving file to: /Users/tm/Dev/private/tf-spaghetti/kubeconfig
    
    # Test your cluster with:
    export KUBECONFIG=/Users/tm/Dev/private/tf-spaghetti/kubeconfig
    kubectl config use-context default
    kubectl get node -o wide
    
    🚀 Speed up GitHub Actions/GitLab CI + reduce costs: https://actuated.dev
    

    It also seems the cluster is named default, which is kind of the worst name for a cluster, so after doing this I did do this:

    • vim $HOME/.kube/config and change basically everything (context, cluster & user name) to $MYCLUSTER

    Or in case you like automation, simply use yq (using vim is actually faster in that case, though):

    KC=/home/.kube/config
    yq eval -i '(.clusters[] | select(.name=="default")).cluster.server="https://localhost:56443"' $KC
    yq eval -i '(.clusters[] | select(.name=="default")).name="MYCLUSTER"' $KC
    yq eval -i '(.contexts[] | select(.name=="default")).context.cluster="MYCLUSTER"' $KC
    yq eval -i '(.contexts[] | select(.name=="default")).contest.user="MYCLUSTER"' $KC
    yq eval -i '(.contexts[] | select(.name=="default")).name="MYCLUSTER"' $KC
    yq eval -i '(.users[] | select(.name=="default")).name="MYCLUSTER"' $KC
    

    Firewall

    So to finally protect the server, let’s install and activate ufw (the “uncomplicated firewall”), following this blog post, slightly modifying based on this article, some general ufw docs from digital ocean, and an overview of flannel networking interfaces from here:

    # sudo apt-get install ufw, naturally ;)
    ufw default deny
    ufw default allow routed
    ufw allow ssh
    
    ufw allow in on cni0 from 10.42.0.0/16              comment "K3s kube-system pod traffic"
    ufw allow in on flannel.1 from 10.42.0.0/16 comment "K3s"
    
    ufw allow "www"        comment "K8s Ingress"
    ufw allow "www Secure" comment "K8s Ingress"
    

    I did not enable ufw and copy-pasted this tmux, so if my ssh connectino broke I could restart the server and would not have been locked out. (I don’t have a root password, so …)

    Controller-based upgrades

    Since this is already taking long, let’s quickly install the upgrade controller and schedule a more in-depth review later 🙂 .

    RANCH=https://github.com/rancher/system-upgrade-controller/releases/latest
    kubectl apply -f $RANCH/download/crd.yaml
    kubectl apply -f $RANCH/download/system-upgrade-controller.yaml
    

    Finally, let’s install FluxCD

    From the professional life I recently came in contact with ArgoCD, and I like it. So I had a look around, and found FluxCD – and this seems also cool.

    So I’m going to try this for myself for now. So, to deploy flux, we have to …

    • Create a cluster-state repository (in my case on GitLab)
    • Create a personal access token with full read/write permissions (there are ways to not do this, which I would definitely do the next time, but this time I was too late). Note that you do this in your Profile, and not the repository settings.
    • Execute flux bootstrap

    After I did the first two things, here I went:

    # Create a gitlab PERSONAL access token with all permissions first.
    # that is done IN YOUR PROFILE, not in the repository.
    # (it should be possible without, yet it was kinda too late)
    flux bootstrap gitlab \
      --owner=my-group \
      --repository=my-state-repo \
      --components source-controller,kustomize-controller,helm-controller,notification-controller
    

    The whole thing is … weird. On the one hand, super cool, everything done. On the other hand, super complex, meeeeh. If you look in the repository online you will notice a new folder flux-system, which we will use right now to add a “Kustomization” I want.

    • Clone out the repo,
    • modify the file flux-system/kustomization.yaml and add this content,
    • perform a git push,
    • “wait” or do this: flux reconcile ks flux-system --with-source.

    And while doing this I learned that FluxCD has no Web UI (well, now it has a 3rd party UI but …). So you can’t really see at a glance whether this worked or not. Or click “update” / “refresh” to get an idea. So … the whole “managing FluxCD” part is … annoying already. Let’s see if this becomes less annoying over time.

    So … maybe also ArgoCD?

    So, since the whole FluxCD thingy was … not so cool, I might actually co-install ArgoCD and see where it leads me.

    But for now, that’s it.
  • GitLab runners, EKS, IRSA and S3 caching

    The problem

    • You do not want to set AWS_* credentials all over your gitlab pipelines
    • You have distributed GitLab runners hosted on kubernetes, and you want to use S3 as a build cache.
    • You want to access AWS resources from your build chain

    The solution

    There’s an official AWS solution: “IRSA”, which stands for “IAM roles for k8s service accounts”. (There is at least another non-AWS one, kube2iam, but this is not subject of this post.)

    IRSA assigns an AWS IAM role to a K8S serviceaccount, which then in turn can be specified for a running pod. There are a couple of pages documenting this, but they are all either too much or too little. I now try do write what I wanted to have.

    Also, nobody has ever documented using that for configuring S3 caching on a K8S GitLab runner. Which is not easy, cause the documentation could honestly be better.

    Advantages of this solution

    • That works with k8s runners just as well as with fargate runners (the way I do them)
    • You are independent from AWS_* credentials in your pipeline
    • You can simply change the IAM role in your pipeline job to get different permissions, you don’t need to create a new user and create new credentials and set them as CI variables, etc.

    What you need

    You need (out of scope):

    For every role you want to use in the cluster, you need …

    • … an IAM role with referencing k8s namespace & service account name
    • … a K8S cluster service account referencing the role ARN
    • this is a reciprocal reference, one references the other, and vice versa!

    That’s what we will do in here.

    The IAM role

    You basically configure a role as every other one, but you will specify a special trust policy. That policy references the OIDC provider, the k8s namespace and the service account in that namespace.

    # terraform code - die hard terraform addict here, sorry.
    
    locals {
      oidc_arn = "arn:aws:iam::123456789012:oidc-provider/oidc.eks.eu-central-1.amazonaws.com/id/deadbeefaffe1234deadbeefaffe1234"
      oidc_url = "https://oidc.eks.eu-central-1.amazonaws.com/id/deadbeefaffe1234deadbeefaffe1234"
      k8s_namespace = "gitlab"
      k8s_service_account_name = "gitlab-runner"
    }
    
    # eks / pod / role stuff: https://is.gd/2skBH7
    resource "aws_iam_role" "k8s_irsa_example_role" {
      name                = "k8s-irsa-example-role"
      assume_role_policy  = data.aws_iam_policy_document.trust_k8s_irsa_example_role.json
      managed_policy_arns = [aws_iam_policy.some_policy.arn]
    }
    
    # this is the PERMISSIONS policy
    data "aws_iam_policy_document" "perms_k8s_irsa_example_role" {
      statement {
        actions = ["s3:*", ]
        resources = [
          "arn:aws:s3:::my-super-duper-gitlab-runner-cache",
          "arn:aws:s3:::my-super-duper-gitlab-runner-cache/*",
        ]
      }}
    
    # this is the TRUST policy
    # the TRUST policy references k8s namespace and service account
    data "aws_iam_policy_document" "trust_k8s_irsa_example_role" {
      statement {
        effect  = "Allow"
        actions = ["sts:AssumeRoleWithWebIdentity"]
        principals {
          type        = "Federated"
          identifiers = [local.oidc.arn]
        }
        condition {
          test     = "StringEquals"
          variable = "${replace(var.oidc_url, "https://", "")}:sub"
          values   = ["system:serviceaccount:${local.k8s_namespace}:${local.k8s_service_account_name}"]
        }
      }
    }
    

    For completeness the trust policy as JSON:

    {
      "Version": "2012-10-17",
      "Statement": [
        {
          "Effect": "Allow",
          "Principal": {
            "Federated": "arn:aws:iam::123456789012:oidc-provider/oidc.eks.eu-central-1.amazonaws.com/id/deadbeefaffe1234deadbeefaffe1234"
          },
          "Action": "sts:AssumeRoleWithWebIdentity",
          "Condition": {
            "StringEquals": {
              "oidc.eks.eu-central-1.amazonaws.com/id/deadbeefaffe1234deadbeefaffe1234:sub": "system:serviceaccount:gitlab:gitlab-runner"
            }
          }
        }
      ]
    }
    

    This is, in fact, all you need from the AWS side of things.

    Some notes:

    • Be absolutely aware that this policy references the name and the namespace in k8s. Also, the service account will reference this policy ARN. So if you change either name, you have to always adjust the other side!

    • For GitLab, you might want to have two of those (you’ll see why later)

    General serviceAccount info

    So this is how any serviceAccount connected to an IAM role looks like:

    apiVersion: v1
    kind: ServiceAccount
    metadata:
      annotations:
        # this is the magic
        # it references the role ARN, which contains the role's name
        eks.amazonaws.com/role-arn: arn:aws:iam::123456789012:role/k8s-irsa-example-role
    
      # the name referenced in the AWS IAM trust policy
      # ("system:serviceaccount:<namespace>:<SERVICEACCOUNTNAME>")
      name: gitlab-runner
    
      # ("system:serviceaccount:<NAMESPACE>:<serviceaccountname>")
      # if you change one, you change both - they reference each other BY NAME
      namespace: gitlab
    

    If you want to test this right now, feel free:

    # $ kubectl apply -n gitlab -f THIS_FILE.yml
    # $ kubectl exec -ti -n gitlab quick-debug-pod -- /bin/bash
    # and then install awscli & ca-certificates to try accessing your s3 bucket :)
    apiVersion: v1
    kind: Pod
    metadata:
      name: quick-debug-pod
      namespace: gitlab
    spec:
      serviceAccountName: gitlab-runner
      containers:
        - name: shell
          image: "ubuntu:latest"
          args: [sleep, infinity]
          resources:
            limits:
              memory: "128Mi"
              cpu: "500m"
    

    General info about GitLab configuration

    REMARK: If you only want to enable your jobs to access AWS resources, you’re in luck. You can skip straight to “Addendum – enabling gitlab JOBS” and you’re done.

    If you want to use the S3 cache, well, … more work.

    Let’s start like this: WHAT YOU MUST KNOW, SUPER IMPORTANT:

    • The main gitlab runner instance will create a pre-signed S3 URL for the gitlab job, and pass it to the k8s pod running the actual job, so the pod running the gitlab job will not need those cache access rights.
    • That means, the S3 policy from above must be attached to the runner itself, and not the pods created by the runner that run the actual pipelines.

    Also, going forward I assume you deploy the gitlab runner using the GitLab runner helm chart.

    Annotate runner pod, short variant

    If you …

    • have only one GitLab runner,
    • and you know the serviceAccount name created by the helm chart,

    … you’re almost done.

    You just need to replace the serviceAccount name (gitlab-runner) name with the actual serviceAccount name on your system, and change one thing in the helm chart:

    ## https://is.gd/Qu1gGv
    rbac:
      create: true
      serviceAccountAnnotations:
        eks.amazonaws.com/role-arn: arn:aws:iam::123456789012:role/k8s-irsa-example-role
    

    See the bottom on how to configure the cache, this is just the role association.

    Annotate runner pod, LONG variant

    In my case it was not so easy:

    • First, I have several runners deployed, and all of them use a different serviceAcount, so that one Role is not going to cut it.
    • Second, I like to have more control over naming, I don’t want to “guess” which name the helm chart gives my serviceAccount, and I don’t want to be vulnerable to name changes.

    So I had to do a bit more work.

    To work in K8S, the GitLab runner needs a …

    • serviceAccount,
    • role,
    • roleBinding.

    We will create those three resources manually now, so we have control over naming and they can be re-used by several gitlab runners (e.g. fargate & cluster).

    In K8S objects, that looks like this:

    # the role
    apiVersion: rbac.authorization.k8s.io/v1
    kind: Role
    metadata:
      name: gitlab-runner-common
      namespace: gitlab
    rules:
      - apiGroups:
          - ""
        resources:
          - "*"
        verbs:
          - "*"
    ---
    # the service account
    apiVersion: v1
    automountServiceAccountToken: true
    kind: ServiceAccount
    metadata:
      annotations:
        eks.amazonaws.com/role-arn: arn:aws:iam::123456789012:role/k8s-irsa-gitlab-runner-common
      name: gitlab-runner-common
      namespace: gitlab
    ---
    # the role binding
    apiVersion: rbac.authorization.k8s.io/v1
    kind: RoleBinding
    metadata:
      name: gitlab-runner-common
      namespace: gitlab
    roleRef:
      apiGroup: rbac.authorization.k8s.io
      kind: Role
      name: gitlab-runner-common
    subjects:
      - kind: ServiceAccount
        name: gitlab-runner-common
        namespace: gitlab
    

    (Btw, I’m using the serviceaccount, role & rolebinding charts here to simplify things – I only want to deal with helm and not with “plain” k8s objects.)

    Adjust your helm chart

    Let’s recap: We now have …

    • An AWS IAM role
    • referencing a namespace & serviceAccount in k8s by name
    • with permissions to access S3
    • A k8s role bound to a serviceAccount in a certain namespace via a rolebinding

    To do that, we need to …

    • disable RBAC creation and reference “our” serviceAccount, and
    • configure the cache.

    Here are the relevant values.yaml file parts:

    ## https://is.gd/Qu1gGv
    rbac:
      # this is basically documented NOWHERE, except here:
      #   https://gitlab.com/gitlab-org/gitlab-runner/-/issues/25972#note_477243643
      create: false
      serviceAccountName: gitlab-runner-common
    

    Configure GitLab S3 cache

    Finally, still in the helm chart’s values file, we do this:

    runners:
      name: "whatever-runner"
    
      config: |
        [[runners]]
          # ...
          [runners.cache]
            Type = "s3"
            Path = "runners-all"
            Shared = true
            [runners.cache.s3]
              ServerAddress = "s3.amazonaws.com"
              BucketName = "my-super-duper-gitlab-runner-cache"
              BucketLocation = "eu-central-1"
              Insecure = false
          # ...
    

    Yup, that’s actually it.

    We should be done.

    Enjoy 🙂

    Addendum – enabling gitlab JOBS

    Now, remember that anything from above will NOT give the actual pipline jobs any additional AWS permissions.

    If you want to access AWS resources out of your jobs, just do this:

    • Create another role, with another association to a serviceAccount,
    • and configure this serviceAccount to be used by the job pods.

    How? Simple. Modify the values file:

    runners:
      config: |
        [[runners]]
          # ...
          [runners.kubernetes]
            # ...
            service_account = "gitlab-jobs"
    

    Bonus – a test pipeline

    # .gitlab-ci.yml
    stages:
      - test
    
    variables:
      CACHE_DIR: hey-ho-cache
    
    .all: &all
      before_script:
        - mkdir -p "$CACHE_DIR"
        - NOWDATE=$(date +%Y%m%d_%H%M%S)
        - CACHEFILE="${CACHE_DIR}/heyho_${NOWDATE}"
        - set -x
    
    .cache: &cache
      paths: [hey-ho-cache]
    
    runner-test-create-cache:
      <<: *all
      image: alpine:edge
      stage: test
      script:
        - echo "waahwaahboogah $NOWDATE" > $CACHEFILE
      cache:
        <<: *cache
      tags:
        - fargate-small
    
    runner-test-check-cache:
      <<: *all
      image: alpine:edge
      stage: test
      script:
        - cat $CACHE_DIR/*
      cache:
        <<: *cache
      needs:
        - runner-test-create-cache
      tags:
        - cluster
        - kubernetes
    

    Troubleshooting

    It doesnt work

    It does.

    If it does not, you have a naming error in your references, or you’re using a wrong serviceAccount for your pods, or you assigned the permission to the wrong entity (jobs instead of runner, or vice versa).

    First, check your annotations and that they reference exiting things.

    It still doesnt work

    It does. Your references are wrong.

    I checked.

    Check again.

    Really.

    Believe me.

    But …

    NO. REALLY.

    And if not, I can’t help you, cause this works.

    (If I have an error here, the principle should be clear – nevertheless I would appreciate a hint if you find one)

    Sources

  • Extract parts of a git repo as new one

    Situation: You have a repository with a subdirectory my/repo/part, which became large and own-project-worthy. You can copy the files into a new repo, but you’ll lose all git history.

    What would be just perfect is: From all commits ever made in this repository, …

    • only keep the parts of all commits which concern files under ./my/repo/part/**
    • remove the path prefix ./my/repo/part/.

    So, basically, rewrite and filter all git commits.

    There’s an app for that: git-filter-repo. And that’s how you use it:

    # clone the repository parallel to the existing one
    git clone git@github.com:me-and/my-repo fool-around-here
    cd fool-around-here
    
    # remove all other files except the ones you want
    # (yup, it's that easy)
    git-filter-repo --path my/repo/part
    
    # move all files to the repository root
    git-filter-repo --subdirectory-filter my/repo/part
    
    # set a new origin URL
    git remote set-url origin git@github.com:me-and/my-new-empty-prepared-repo
    
    # push.
    git push
    

    The git history has been rewritten 1984-style. For git it has always been exactly like this now.

  • Auto-rebuild Docker images if base image changes using GitHub actions

    Let’s say you have a rather static docker image which is based on another image which changes frequently. Now your image should be rebuilt on two occasions: if your content changes, but also if the image yours is based on changed. This can be done relatively simple using a GitHub actions cron schedule. You just have to create an actions workflow file in your repository.

    Adjust to your needs accordingly, and probably one can optimize even more by templating this.

    # FILE LOCATION IN REPOSITORY:
    #
    #   .github/workflows/auto-build-on-base-image-change.yml
    #
    
    name: Regular base image update check
    on:
      schedule:
        - cron: "23 13 3 * *"
      workflow_dispatch:
    
    jobs:
      build:
        runs-on: ubuntu-latest
        steps:
          # Checks-out your repository under $GITHUB_WORKSPACE, so your job can access it
          - uses: actions/checkout@v2
    
          - name: Docker Image Update Checker
            id: baseupdatecheck
            uses: lucacome/docker-image-update-checker@v1.1.0
            with:
              base-image: library/golang:alpine
              image: flypenguin/homepage-builder # update for your image
    
          # only execute subsequent steps if an update is actually NEEDED.
          # unfortunately we need to add an if-condition to all steps now
          # because a clean exit can't be triggered within a job it seems
          # (a cancellation is NOT the same and triggers a failure email)
          # see also https://github.com/actions/runner/issues/662
    
          - name: Login to DockerHub
            uses: docker/login-action@v1
            with:
              username: ${{ secrets.DOCKERHUB_USERNAME }}
              password: ${{ secrets.DOCKERHUB_TOKEN }}
            if: steps.baseupdatecheck.outputs.needs-updating == 'true'
    
          - name: Build and push Docker images
            uses: docker/build-push-action@v2.6.1
            with:
              context: "${{ github.workspace }}"
              push: true
              tags: flypenguin/homepage-builder:latest # update for your image
            if: steps.baseupdatecheck.outputs.needs-updating == 'true'
    

    This particular image is a builder image for Hugo sites. Hugo switched from git submodule based theme management to a Go module based theme & plugin management. So the my builder image needs Go installed now. The easiest way to do this is to base this image on the official golang image. Since installing Go on every build adds time and network traffic this seemd “uncool”, so auto-updating the base image it was.

    Sources:

    • https://git.io/JZns3
    • https://git.io/JB2AX
    • https://git.io/JB2x0
  • nextcloud and Docker and reverse proxies

    I have a nextcloud setup like described here (docker-compose, let’s encrypt proxy companion, postgres and nextcloud). And for a while I couldn’t connect any new nextcloud clients to the installation.

    This fixed it:

    <?php
    $CONFIG = array (
      # manually added because it's not picked up from
      # the env vars once set ... it seems ...
    
      # the docker IP range
      'trusted_proxies' => ["172.16.0.0/12"],
    
      # the hostname of the server
      'overwritehost'   => "my.super.secret.server",
    
      # the ENDUSER->PROXY protocol, NOT the proxy-> nextcloud protocol!
      'overwriteprotocol' => "https",
    
      #
      # AAAND NOW back to the original config file ...
      # ...
    )
    

    Some notes:

  • SARS-CoV-2, a.k.a “Corona Virus”, pseudo “data science” and Twitter

    Some terminology (taken from – who would have thought it – t-online.de) and background information:

    • SARS-CoV-2 is the correct name of the virus. Everybody calls him “the Corona Virus” though, which is technically incorrect, cause there’s only the family of corona viruses – it’s a group, not a single one.
    • COVID-19 is the name of the disease. It’s an acronym made of “COrona VIrus Disease 19“. (It’s basically the same as HIV and AIDS – one is the infection, the other the actual illness).
    • It’s not the flu, but I think everybody has that down by now
    • It’s R0-value (how many people are infected by one person on average) is about 3 (source: RKI Germany)

    All of us are following the development of this very closely, cause we have no choice since we’re all basically locked at home. And even if we would go out everything’s closed. That gives us a ton of time to play DOOM Eternal (me), or write twitter bots who regularly publish the numbers of COVID-19 infections in Germany (me as well). As macabre as it is, this is very good oppotunity to start fooling around with data science. But to do this you need datasets, which are surprisingly hard to get. For the current case numbers  I found those:

    There’s probably more, but like I said – it’s surprisingly hard to find regularly updated, publicly available data sets in machine-readable form. (Also, this is the first time I go looking for this stuff, so maybe I just have no clue).

    Now back to the twitter bot. What does it do exactly? Go look for yourself, but if you are too lazy:

    • It prints the current infection rate at 8h, 12h, 16h, 20h. At the last time it will include a graph, a 1-week-forecast and a small evaluation how are stand today in comparison to the forecast which would have been made a week ago.
    • A friend helped me greatly by providing first a Holt-Winters prediction (which is live now), and then upgraded this to a more intelligent ARIMA prediction, which is still buried in a jupyter notebook and waiting for daylight. (Maybe she will write a guest post here to explain what it does and how it works – but I haven’t asked yet).
    • As for the bot’s code – it’s not (yet) public. Which is unusual for me, really. I should remedy that.

    What I learned so far:

    • It’s surprsingly easy and hard at the same time to get a Twitter developer account
    • Twitter does not permit publishing the exact same tweet multiple times in a short period of time
    • Heroku is really really nice for this, as long as you don’t need to pay for it. I would be interested in alternatives.
    • matplotlib is a lot more complicated than I expected
    • but strangely neither bokeh, nor plotly can actually export png graphics without either a separate electron app (WTF?) or a headless browser and selenium (W-T-F?!?)
    • pandas rocks, or more precisely: pandas data frames rock.
    • there does not seem to be a single properly maintained Twitter library for JavaScript, but there is at least tweepy for Python. (I mean I want to try something in JS, but honestly, if everything I find is outdated, I just stay with good old Python …)
    • The infection growth is intensely exponetial – almost a straight line on a log scale plot.

    Let’s see where this goes, and I hope you all stay healthy.

  • Build your own PaaS with Dokku

    I was looking for some “play” deployment method for a couple of things I want to try out. Most of them require a database. And it should be cheap, cause I don’t have any load on them and don’t earn any money, so I don’t want to spend basically no money if possible. The usual suspects are too expensive – AWS, Heroku, etc.

    So I looked around and found Dokku.

    Dokku is a set of – hang on – shell scripts – which basically emulate Heroku on a machine of your own. It’s integrated with Digital Ocean droplets out of the box, if you want it. And the whole thing is 5 € / month, which is perfect. It also integrates with a Dockerfile based deployment, so you do git push and everything just works.

    It’s amazing.

    This is how you get started. But before you can get started, you need a domain you control, either on AWS or any other hoster. This is for routing traffic to your deployments later. You also need a public SSH key, or better a public / private key pair. Once you have both you can …

    1. create a Digital Ocean account, and …
    2. add your SSH public key to your account, and …
    3. in that account, create a new droplet with a “Dokku” image preinstalled.
    4. Wait until the droplet finished provisioning.

    create new droplet

    While the droplet is being created, you can also create a project locally to test it later:

    $ mkdir dokku-test
    $ cd dokku-test
    $ git init
    $ echo "FROM tutum/hello-world" > Dockerfile
    $ git add Dockerfile
    $ git commit -m "Initial commit"
    

    In this little test project we only create a Dockerfile from an hello-world image which displays “Hello world” in a browser so we can verify it worked.

    Once the droplet is done, you can start setting up your personal little PaaS. First, you have to configure your DNS. We will set up a wildcard entry for our deployments, and a non-wildcard entry for git. Let’s assume your domain is for-myself.com, then you would add …

    • my-paas.for-myself.com , type “A” (or “AAAA” if you are IPv6) to your droplet IP
    • *.my-paas.for-myself.com just the same

    Then you SSH into your droplet, and create your dokku project. (This is something you have to do for every project). All you have to do for this is:

    $ ssh root@DROPLET_IP
    ~# dokku apps:create hello-world
    -----> Creating hello-world... done
    ~# _
    

    Done.

    Now you configure a git remote URL for your project, and push it:

    $ git remote add dokku dokku@my-paas.for-myself.com:hello-world
    

    Again – done. If you push your project now (assuming DNS is already set), everything should happen automagically:

    $ git push --set-upstream dokku master
    X11 forwarding request failed
    Enumerating objects: 3, done.
    Counting objects: 100% (3/3), done.
    Writing objects: 100% (3/3), 241 bytes | 241.00 KiB/s, done.
    Total 3 (delta 0), reused 0 (delta 0)
    -----> Cleaning up...
    -----> Building hello-world from dockerfile...
    remote: build context to Docker daemon  2.048kB
    Step 1/1 : FROM tutum/hello-world
    latest: Pulling from tutum/hello-world
    658bc4dc7069: Pulling fs layer
    [... TRUNCATED ...]
    983d35417974: Pull complete
    Digest: sha256:0d57def8055178aafb4c7669cbc25ec17f0acdab97cc587f30150802da8f8d85
    Status: Downloaded newer image for tutum/hello-world:latest
     ---> 31e17b0746e4
    Successfully built 31e17b0746e4
    Successfully tagged dokku/hello-world:latest
    -----> Setting config vars
           DOKKU_DOCKERFILE_PORTS:  80/tcp
    -----> Releasing hello-world (dokku/hello-world:latest)...
    -----> Deploying hello-world (dokku/hello-world:latest)...
    -----> Attempting to run scripts.dokku.predeploy from app.json (if defined)
    -----> No Procfile found in app image
    -----> DOKKU_SCALE file not found in app image. Generating one based on Procfile...
    -----> New DOKKU_SCALE file generated
    =====> web=1
    -----> Attempting pre-flight checks
           For more efficient zero downtime deployments, create a file CHECKS.
           See http://dokku.viewdocs.io/dokku/deployment/zero-downtime-deploys/ for examples
           CHECKS file not found in container: Running simple container check...
    -----> Waiting for 10 seconds ...
    -----> Default container check successful!
    -----> Running post-deploy
    -----> Creating new /home/dokku/hello-world/VHOST...
    -----> Setting config vars
           DOKKU_PROXY_PORT_MAP:  http:80:80
    -----> Configuring hello-world.my-paas.for-myself.com...(using built-in template)
    -----> Creating http nginx.conf
    -----> Running nginx-pre-reload
           Reloading nginx
    -----> Setting config vars
           DOKKU_APP_RESTORE:  1
    =====> Renaming container (14c349cb496d) amazing_snyder to hello-world.web.1
    -----> Attempting to run scripts.dokku.postdeploy from app.json (if defined)
    =====> Application deployed:
           http://hello-world.my-paas.for-myself.com
    
    To my-paas.for-myself.com:hello-world
     * [new branch]      master -> master
    Branch 'master' set up to track remote branch 'master' from 'dokku'.
    

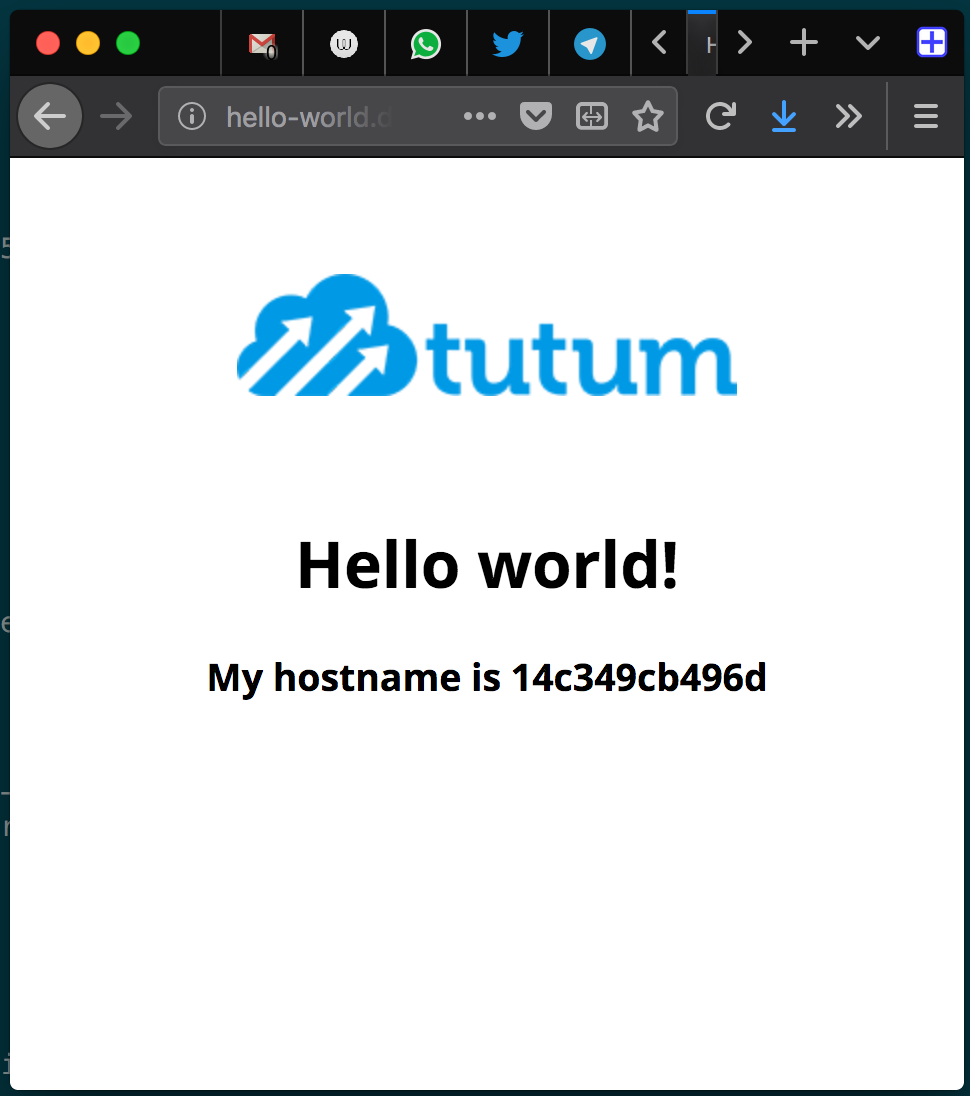
    And if you open your URL now (which is hello-world.my-paas.for-myself.com) you should see this image:

    browser display of deployed example site

    Now, for 5 € / month you get:

    • A heroku-like, no-nonsense, fully automated, git-based deployment platform
    • A server which you control (and have to maintain, okay, but on which you can deploy …)
    • A database (or many of them – dokku provides great integration for databases btw; more on that in another post)
    • Publicly reachable deployments (for customers, testing, whatever)
    • Let’s Encrypt certificates (dokku provides support for these as well, again more in a later post)
    • And for 1 € more (it’s always 20% of the base price) you get backups of your system)

    That’s absolutely incredible. Oh, and did I mention that the maintainers are not only friendly, but also super responsive and incredibly helpful on Slack?

  • GitLab spot runners & Puppet

    We are on AWS with GitLab. For ease of use, and because our build hosts degenerate for some reason (network issues), we decided to use spot instances with GitLab.

    The journey was all but easy. Here’s why.

    GitLab Runner configuration complaints

    First: The process

    To configure GitLab runner, you have to …

    • install GitLab,
    • write down the runner registration token,
    • start a runner,
    • manually a registration command using above token.

    That registration command will then modify the config file of the runner. That is important because you can’t just write a static, read-only config file and start the runner. This is not possible for two reasons:

    • when you execute the registration command, the runner wants to modify the config file to add yet another token (its “personal” token, not the general registration secret), so it must not be read-only
    • the runner has to be registered, so just starting it will do … nothing.

    That is in my eyes a huge design flaw, which undoubtedly has its reasons, but it still – sorry – sucks IMHO.

    Second: The configuration

    You can configure pretty much everything in the config file. But once the runner registers, the registration process for some reason appends a completely new config to any existing config file, so that … the state is weird. It works, but it looks fucked, and feels fucked.

    You can also set all configuration file entries using the gitlab-runner register  command. Well, not all: The global parameters (like, for example, log_level  or concurrent ) cannot be set. Those have to be in a pre-existing config file, so you need both – the file and the registration command, which will look super ugly in a very short time.

    Especially if you still use Puppet to manage the runners, cause then you just can’t just restart the runner once the config file changes. Because it will always change, because of above reasons.

    Third: The AWS permission documentation

    Another thing is that the list of AWS permissions the runner needs in order to create spot instances is nowhere to be found. Hint: EC2FullAccess  and S3FullAccess is not enough. We are using admin permissions right now, until we figured it out. Not nice.

    Our solution

    For this we’re still using Puppet (our K8S migration is still ongoing), and our solution so far looks like this:

    • Create a config file with puppet next to the designated config file location,
    • containing only global parameters.
    • The file has a puppet hook which triggers an exec that deletes the “final” config file if the puppet-created one has changed.
    • Start the GitLab runner.
    • Perform a “docker exec” which registers the runner in GitLab.
    • The “unless” contains a check that skips execution if the final config file is present.
    • The register  command sets all configuration values except the global ones. Like said above, the command appends all non-global config settings to any existing config file.

    Some code

    #
    # CONFIG VALUES
    #
    
    # the configuration for the build runner running on the same host, which
    # manages the autoscaling-based spot-instance-allocation
    global::concurrent: "5"
    
    registration_command::docker_image: "ubuntu:artful"
    registration_command::token: "our-token"
    registration_command::url: "https://our.gitlab.server"
    
    runners::concurrency: "1"
    runners::limit: "10"
    runners::name: "spot-runner"
    
    cache::bucket_location: "eu-central-1"
    cache::bucket_name: "our-cache-bucket"
    cache::shared: "true"
    cache::type: "s3"
    
    machine::idle_nodes: "0"
    machine::idle_time: "1800"
    machine::max_builds: "10"
    machine::machine_name: "standard-%s"
    
    machine::option::access_key: "%{hiera('ops::gitlab::spotrunner::id')}"
    machine::option::ami: "ami-44d48eaf"
    machine::option::block_minutes: "60"
    machine::option::iam_profile: "gitlab-runner"
    machine::option::instance_type: "m4.xlarge"
    machine::option::private_address_only: "true"
    machine::option::private_address: "true"
    machine::option::region: "eu-central-1"
    machine::option::secret_key: "%{hiera('ops::gitlab::spotrunner::secret')}"
    machine::option::spot_instances: "true"
    machine::option::spot_price: "0.2"
    machine::option::subnet_id: "subnet-subbb"
    machine::option::tags: "stage,prod"
    machine::option::vpc_id: "vpc-veepeecee"
    
    machine::option::other: >
      --machine-machine-options amazonec2-security-group=cognodev3_sg_docker_machine
      --machine-machine-options amazonec2-security-group=cognodev3-SG0-shubdu
      --machine-machine-options amazonec2-security-group=cognodev3-SG1-shalala
      --machine-machine-options amazonec2-security-group=cognodev3-SG2-shubndibndu
      --machine-machine-options engine-insecure-registry=some.internal.repo
      --machine-machine-options engine-insecure-registry=other.internal.repo:5000
    
    #
    # START
    #
    
    ## GITLAB SPOT INSTANCE RUNNER
    
    create::docker_containers:
      # gitlab spot runner
      gitlab-spot-runner:
        image: gitlab/gitlab-runner:latest
        pull_on_start: true
        volumes:
          - /var/docker-apps/gitlab-spot-runner:/etc/gitlab-runner
          - /var/run/docker.sock:/var/run/docker.sock
          - /var/run/.docker:/root/.docker
    
    create::files:
      "/var/docker-apps/gitlab-spot-runner/config.toml.puppet":
        ensure: present
        notify: "Service[docker-gitlab-spot-runner]"
        content: |
          concurrent = %{hiera('global::concurrent')}
          check_interval = 0
    
    create::execs:
      "delete config file":
        command: rm /etc/gitlab-runner/config.toml
        path: /bin:/usr/bin:/sbin:/usr/sbin
        refreshonly: true
        subscribe: File[/etc/gitlab-runner/config.toml.puppet]
        before: Docker::Exec[register-spot-runner]
    
    # why are we doing this?
    # because gitlab WANTS to re-write the config file. and we CANNOT set "global"
    # parameters (e.g. "log_level", "concurrent") in using the registration
    # command line.
    # so, we ...
    #    * create a config "config.toml.puppet" file with ONLY global params
    #    * rm the config.toml file in case of changes to the .puppet file
    #    * re-execute registration using ALL other config settings when the
    #      config.toml file is no longer present
    # we do this because:
    #    * we can't watch the toml file for changes, cause the runner WILL change
    #      it
    #    * but we WANT to set global parameters, and luckily the runner seems
    #      to just append all non-global settings to an existing config file
    #      on registration.
    # THIS FUCKING SUCKS. I know. but I really have not found another way (abk)
    
    create::docker_execs:
      "register-spot-runner":
        detach: false
        container: gitlab-spot-runner
        tty: true
        command: >-
          /bin/bash -c 'cp /etc/gitlab-runner/config.toml.puppet /etc/gitlab-runner/config.toml &&
          gitlab-runner register --non-interactive
          --registration-token %{hiera('registration_command::token')}
          --url %{hiera('registration_command::url')}
          --executor "docker+machine"
          --docker-image %{hiera('registration_command::docker_image')}
          --locked=false
          --run-untagged
          --docker-volumes /var/run/docker.sock:/var/run/docker.sock
          --name %{hiera('runners::name')}
          --limit %{hiera('runners::limit')}
          --request-concurrency %{hiera('runners::concurrency')}
          --cache-cache-shared=%{hiera('cache::shared')}
          --cache-s3-bucket-location %{hiera('cache::bucket_location')}
          --cache-s3-bucket-name %{hiera('cache::bucket_name')}
          --cache-type %{hiera('cache::type')}
          --machine-machine-driver amazonec2
          --machine-idle-nodes %{hiera('machine::idle_nodes')}
          --machine-idle-time  %{hiera('machine::idle_time')}
          --machine-machine-name %{hiera('machine::machine_name')}
          --machine-max-builds %{hiera('machine::max_builds')}
          --machine-machine-options amazonec2-private-address-only=%{hiera('machine::option::private_address_only')}
          --machine-machine-options amazonec2-use-private-address=%{hiera('machine::option::private_address')}
          --machine-machine-options amazonec2-region=%{hiera('machine::option::region')}
          --machine-machine-options amazonec2-access-key=%{hiera('machine::option::access_key')}
          --machine-machine-options amazonec2-ami=%{hiera('machine::option::ami')}
          --machine-machine-options amazonec2-block-duration-minutes=%{hiera('machine::option::block_minutes')}
          --machine-machine-options amazonec2-iam-instance-profile=%{hiera('machine::option::iam_profile')}
          --machine-machine-options amazonec2-instance-type=%{hiera('machine::option::instance_type')}
          --machine-machine-options amazonec2-request-spot-instance=%{hiera('machine::option::spot_instances')}
          --machine-machine-options amazonec2-secret-key=%{hiera('machine::option::secret_key')}
          --machine-machine-options amazonec2-spot-price=%{hiera('machine::option::spot_price')}
          --machine-machine-options amazonec2-subnet-id=%{hiera('machine::option::subnet_id')}
          --machine-machine-options amazonec2-tags=%{hiera('machine::option::tags')}
          --machine-machine-options amazonec2-vpc-id=%{hiera('machine::option::vpc_id')}
          %{hiera('machine::option::other')}'
        unless: test -f /etc/gitlab-runner/config.toml
        require: Service[docker-gitlab-spot-runner]
    

    Does this look ugly? You bet.

    Should this be a puppet module? Most probably.

    Did I foresee this? Nope.

    Am I completely fed up? Yes.

    Is this stuff I want to do? No.

    Does it work?

    … Yes (at least … 🙂 )

    Remarks

    If you wander what all those create::THING  entries are – it’s this:

    $files = hiera_hash('create::files', {})
    if ! empty($files) {
      create_resources('file', $files)
    }
    

    We have an awful lot of those, cause then we can do a lot of stuff in the config YAMLs and don’t need to go in puppet DSL code.

  • No password prompts for GitHub “hub” client

    GitHub has a little cli tool called “hub” which makes working with repos a bit easier (“hub pull-request” instead of a lot of clicking around on the web). Unfortunately they don’t really tell you how to prevent password inputs every time you use it.

    Unless you dig deep:

  • Git rebase interactive with very first commit visible

    Ever wanted to squash the first two commits with a “git rebase -i”? No? Me neither. Until today.

    Stackoverflow to the rescue:

    git rebase -i --root
    

    Done.