Tag: k8s

  • K8S Cluster autoscaler crashlooping on EKS

    I just fixed a badly crashlooping cluster autoscaler on EKS. Two things I found noteworthy:

    • On weird error messages (failed to list *v1.CSIStorageCapacity) it might be a version mismatch: The autoscaler version must match the k8s version used (e.g. k8s v1.21 requires cluster autoscaler 1.21.x)
    • On no error messages at all (see below for example) it might be a permissions issue with the AWS APIs.

    Fixing the image version

    I’m using the autoscaler helm chart for it, this just needs an annotation:

    image:
      # IMPORTANT: this value _MUST_ match the k8s version: x.y.(patch)
      tag: v1.21.1
    

    Note: You do not have to use the repo mentioned in the original comment.

    Fixing the permissions issue

    In my case, I referenced the wrong ServiceAccount in my AWS IRSA role trust policy. So for “future me”, check this:

    • does the autoscaler pod have IRSA credentials assigned from its ServiceAccount?
    • to add the reference using the helm chart, see below
    • does the ServiceAccount reference the correct AWS IRSA policy? (typos, wrong policy, …)
    • does the AWS IRSA policy reference the designated ServiceAccount correctly`? (wrong namespace, typos, …)

    Also, i explicitly name the ServiceAccount created by the helm chart, so I don’t have to guess what I need to reference from AWS:

    rbac:
      serviceAccount:
        annotations:
          # this adds the IRSA reference to the ServiceAccount created
          "eks.amazonaws.com/role-arn": "arn:aws:iam::123456789012:role/whatever-your-role-name-is"
    
        # this explicitly controls the name of the ServiceAccount, so we can refernce safely from AWS
        name: cluster-autoscaler
    

    Error examples

    Exmaple of “no error” crashloop

        /gopath/src/k8s.io/autoscaler/cluster-autoscaler/vendor/k8s.io/apimachinery/pkg/watch/streamwatcher.go:71 +0xbe
    
    goroutine 297 [sync.Cond.Wait]:
    runtime.goparkunlock(...)
        /usr/local/go/src/runtime/proc.go:310
        [...]
    created by k8s.io/autoscaler/cluster-autoscaler/vendor/k8s.io/apimachinery/pkg/watch.NewStreamWatcher
        /gopath/src/k8s.io/autoscaler/cluster-autoscaler/vendor/k8s.io/apimachinery/pkg/watch/streamwatcher.go:71 +0xbe
    
    goroutine 299 [sync.Cond.Wait]:
    runtime.goparkunlock(...)
        /usr/local/go/src/runtime/proc.go:310
        [...]
    created by k8s.io/autoscaler/cluster-autoscaler/vendor/k8s.io/apimachinery/pkg/watch.NewStreamWatcher
        /gopath/src/k8s.io/autoscaler/cluster-autoscaler/vendor/k8s.io/apimachinery/pkg/watch/streamwatcher.go:71 +0xbe
    
    goroutine 366 [IO wait]:
    internal/poll.runtime_pollWait(0x7f2e1059ebb0, 0x72, 0xffffffffffffffff)
        /usr/local/go/src/runtime/netpoll.go:203 +0x55
        [...]
    created by net/http.(*Transport).dialConn
        /usr/local/go/src/net/http/transport.go:1706 +0xc56
    
    goroutine 367 [select]:
    net/http.(*persistConn).writeLoop(0xc0017e8480)
        /usr/local/go/src/net/http/transport.go:2336 +0x11c
    created by net/http.(*Transport).dialConn
        /usr/local/go/src/net/http/transport.go:1707 +0xc7b
    Stream closed EOF for kube-system/cluster-autoscaler-aws-cluster-autoscaler-69f85b8f6d-hbpvv (aws-cluster-autoscaler)
    

    Example of “error” crashloop

    Failed to watch *v1.CSIStorageCapacity: failed to list *v1.CSIStorageCapacity: the server could not find the requested resource
    
  • GitLab runners, EKS, IRSA and S3 caching

    The problem

    • You do not want to set AWS_* credentials all over your gitlab pipelines
    • You have distributed GitLab runners hosted on kubernetes, and you want to use S3 as a build cache.
    • You want to access AWS resources from your build chain

    The solution

    There’s an official AWS solution: “IRSA”, which stands for “IAM roles for k8s service accounts”. (There is at least another non-AWS one, kube2iam, but this is not subject of this post.)

    IRSA assigns an AWS IAM role to a K8S serviceaccount, which then in turn can be specified for a running pod. There are a couple of pages documenting this, but they are all either too much or too little. I now try do write what I wanted to have.

    Also, nobody has ever documented using that for configuring S3 caching on a K8S GitLab runner. Which is not easy, cause the documentation could honestly be better.

    Advantages of this solution

    • That works with k8s runners just as well as with fargate runners (the way I do them)
    • You are independent from AWS_* credentials in your pipeline
    • You can simply change the IAM role in your pipeline job to get different permissions, you don’t need to create a new user and create new credentials and set them as CI variables, etc.

    What you need

    You need (out of scope):

    For every role you want to use in the cluster, you need …

    • … an IAM role with referencing k8s namespace & service account name
    • … a K8S cluster service account referencing the role ARN
    • this is a reciprocal reference, one references the other, and vice versa!

    That’s what we will do in here.

    The IAM role

    You basically configure a role as every other one, but you will specify a special trust policy. That policy references the OIDC provider, the k8s namespace and the service account in that namespace.

    # terraform code - die hard terraform addict here, sorry.
    
    locals {
      oidc_arn = "arn:aws:iam::123456789012:oidc-provider/oidc.eks.eu-central-1.amazonaws.com/id/deadbeefaffe1234deadbeefaffe1234"
      oidc_url = "https://oidc.eks.eu-central-1.amazonaws.com/id/deadbeefaffe1234deadbeefaffe1234"
      k8s_namespace = "gitlab"
      k8s_service_account_name = "gitlab-runner"
    }
    
    # eks / pod / role stuff: https://is.gd/2skBH7
    resource "aws_iam_role" "k8s_irsa_example_role" {
      name                = "k8s-irsa-example-role"
      assume_role_policy  = data.aws_iam_policy_document.trust_k8s_irsa_example_role.json
      managed_policy_arns = [aws_iam_policy.some_policy.arn]
    }
    
    # this is the PERMISSIONS policy
    data "aws_iam_policy_document" "perms_k8s_irsa_example_role" {
      statement {
        actions = ["s3:*", ]
        resources = [
          "arn:aws:s3:::my-super-duper-gitlab-runner-cache",
          "arn:aws:s3:::my-super-duper-gitlab-runner-cache/*",
        ]
      }}
    
    # this is the TRUST policy
    # the TRUST policy references k8s namespace and service account
    data "aws_iam_policy_document" "trust_k8s_irsa_example_role" {
      statement {
        effect  = "Allow"
        actions = ["sts:AssumeRoleWithWebIdentity"]
        principals {
          type        = "Federated"
          identifiers = [local.oidc.arn]
        }
        condition {
          test     = "StringEquals"
          variable = "${replace(var.oidc_url, "https://", "")}:sub"
          values   = ["system:serviceaccount:${local.k8s_namespace}:${local.k8s_service_account_name}"]
        }
      }
    }
    

    For completeness the trust policy as JSON:

    {
      "Version": "2012-10-17",
      "Statement": [
        {
          "Effect": "Allow",
          "Principal": {
            "Federated": "arn:aws:iam::123456789012:oidc-provider/oidc.eks.eu-central-1.amazonaws.com/id/deadbeefaffe1234deadbeefaffe1234"
          },
          "Action": "sts:AssumeRoleWithWebIdentity",
          "Condition": {
            "StringEquals": {
              "oidc.eks.eu-central-1.amazonaws.com/id/deadbeefaffe1234deadbeefaffe1234:sub": "system:serviceaccount:gitlab:gitlab-runner"
            }
          }
        }
      ]
    }
    

    This is, in fact, all you need from the AWS side of things.

    Some notes:

    • Be absolutely aware that this policy references the name and the namespace in k8s. Also, the service account will reference this policy ARN. So if you change either name, you have to always adjust the other side!

    • For GitLab, you might want to have two of those (you’ll see why later)

    General serviceAccount info

    So this is how any serviceAccount connected to an IAM role looks like:

    apiVersion: v1
    kind: ServiceAccount
    metadata:
      annotations:
        # this is the magic
        # it references the role ARN, which contains the role's name
        eks.amazonaws.com/role-arn: arn:aws:iam::123456789012:role/k8s-irsa-example-role
    
      # the name referenced in the AWS IAM trust policy
      # ("system:serviceaccount:<namespace>:<SERVICEACCOUNTNAME>")
      name: gitlab-runner
    
      # ("system:serviceaccount:<NAMESPACE>:<serviceaccountname>")
      # if you change one, you change both - they reference each other BY NAME
      namespace: gitlab
    

    If you want to test this right now, feel free:

    # $ kubectl apply -n gitlab -f THIS_FILE.yml
    # $ kubectl exec -ti -n gitlab quick-debug-pod -- /bin/bash
    # and then install awscli & ca-certificates to try accessing your s3 bucket :)
    apiVersion: v1
    kind: Pod
    metadata:
      name: quick-debug-pod
      namespace: gitlab
    spec:
      serviceAccountName: gitlab-runner
      containers:
        - name: shell
          image: "ubuntu:latest"
          args: [sleep, infinity]
          resources:
            limits:
              memory: "128Mi"
              cpu: "500m"
    

    General info about GitLab configuration

    REMARK: If you only want to enable your jobs to access AWS resources, you’re in luck. You can skip straight to “Addendum – enabling gitlab JOBS” and you’re done.

    If you want to use the S3 cache, well, … more work.

    Let’s start like this: WHAT YOU MUST KNOW, SUPER IMPORTANT:

    • The main gitlab runner instance will create a pre-signed S3 URL for the gitlab job, and pass it to the k8s pod running the actual job, so the pod running the gitlab job will not need those cache access rights.
    • That means, the S3 policy from above must be attached to the runner itself, and not the pods created by the runner that run the actual pipelines.

    Also, going forward I assume you deploy the gitlab runner using the GitLab runner helm chart.

    Annotate runner pod, short variant

    If you …

    • have only one GitLab runner,
    • and you know the serviceAccount name created by the helm chart,

    … you’re almost done.

    You just need to replace the serviceAccount name (gitlab-runner) name with the actual serviceAccount name on your system, and change one thing in the helm chart:

    ## https://is.gd/Qu1gGv
    rbac:
      create: true
      serviceAccountAnnotations:
        eks.amazonaws.com/role-arn: arn:aws:iam::123456789012:role/k8s-irsa-example-role
    

    See the bottom on how to configure the cache, this is just the role association.

    Annotate runner pod, LONG variant

    In my case it was not so easy:

    • First, I have several runners deployed, and all of them use a different serviceAcount, so that one Role is not going to cut it.
    • Second, I like to have more control over naming, I don’t want to “guess” which name the helm chart gives my serviceAccount, and I don’t want to be vulnerable to name changes.

    So I had to do a bit more work.

    To work in K8S, the GitLab runner needs a …

    • serviceAccount,
    • role,
    • roleBinding.

    We will create those three resources manually now, so we have control over naming and they can be re-used by several gitlab runners (e.g. fargate & cluster).

    In K8S objects, that looks like this:

    # the role
    apiVersion: rbac.authorization.k8s.io/v1
    kind: Role
    metadata:
      name: gitlab-runner-common
      namespace: gitlab
    rules:
      - apiGroups:
          - ""
        resources:
          - "*"
        verbs:
          - "*"
    ---
    # the service account
    apiVersion: v1
    automountServiceAccountToken: true
    kind: ServiceAccount
    metadata:
      annotations:
        eks.amazonaws.com/role-arn: arn:aws:iam::123456789012:role/k8s-irsa-gitlab-runner-common
      name: gitlab-runner-common
      namespace: gitlab
    ---
    # the role binding
    apiVersion: rbac.authorization.k8s.io/v1
    kind: RoleBinding
    metadata:
      name: gitlab-runner-common
      namespace: gitlab
    roleRef:
      apiGroup: rbac.authorization.k8s.io
      kind: Role
      name: gitlab-runner-common
    subjects:
      - kind: ServiceAccount
        name: gitlab-runner-common
        namespace: gitlab
    

    (Btw, I’m using the serviceaccount, role & rolebinding charts here to simplify things – I only want to deal with helm and not with “plain” k8s objects.)

    Adjust your helm chart

    Let’s recap: We now have …

    • An AWS IAM role
    • referencing a namespace & serviceAccount in k8s by name
    • with permissions to access S3
    • A k8s role bound to a serviceAccount in a certain namespace via a rolebinding

    To do that, we need to …

    • disable RBAC creation and reference “our” serviceAccount, and
    • configure the cache.

    Here are the relevant values.yaml file parts:

    ## https://is.gd/Qu1gGv
    rbac:
      # this is basically documented NOWHERE, except here:
      #   https://gitlab.com/gitlab-org/gitlab-runner/-/issues/25972#note_477243643
      create: false
      serviceAccountName: gitlab-runner-common
    

    Configure GitLab S3 cache

    Finally, still in the helm chart’s values file, we do this:

    runners:
      name: "whatever-runner"
    
      config: |
        [[runners]]
          # ...
          [runners.cache]
            Type = "s3"
            Path = "runners-all"
            Shared = true
            [runners.cache.s3]
              ServerAddress = "s3.amazonaws.com"
              BucketName = "my-super-duper-gitlab-runner-cache"
              BucketLocation = "eu-central-1"
              Insecure = false
          # ...
    

    Yup, that’s actually it.

    We should be done.

    Enjoy 🙂

    Addendum – enabling gitlab JOBS

    Now, remember that anything from above will NOT give the actual pipline jobs any additional AWS permissions.

    If you want to access AWS resources out of your jobs, just do this:

    • Create another role, with another association to a serviceAccount,
    • and configure this serviceAccount to be used by the job pods.

    How? Simple. Modify the values file:

    runners:
      config: |
        [[runners]]
          # ...
          [runners.kubernetes]
            # ...
            service_account = "gitlab-jobs"
    

    Bonus – a test pipeline

    # .gitlab-ci.yml
    stages:
      - test
    
    variables:
      CACHE_DIR: hey-ho-cache
    
    .all: &all
      before_script:
        - mkdir -p "$CACHE_DIR"
        - NOWDATE=$(date +%Y%m%d_%H%M%S)
        - CACHEFILE="${CACHE_DIR}/heyho_${NOWDATE}"
        - set -x
    
    .cache: &cache
      paths: [hey-ho-cache]
    
    runner-test-create-cache:
      <<: *all
      image: alpine:edge
      stage: test
      script:
        - echo "waahwaahboogah $NOWDATE" > $CACHEFILE
      cache:
        <<: *cache
      tags:
        - fargate-small
    
    runner-test-check-cache:
      <<: *all
      image: alpine:edge
      stage: test
      script:
        - cat $CACHE_DIR/*
      cache:
        <<: *cache
      needs:
        - runner-test-create-cache
      tags:
        - cluster
        - kubernetes
    

    Troubleshooting

    It doesnt work

    It does.

    If it does not, you have a naming error in your references, or you’re using a wrong serviceAccount for your pods, or you assigned the permission to the wrong entity (jobs instead of runner, or vice versa).

    First, check your annotations and that they reference exiting things.

    It still doesnt work

    It does. Your references are wrong.

    I checked.

    Check again.

    Really.

    Believe me.

    But …

    NO. REALLY.

    And if not, I can’t help you, cause this works.

    (If I have an error here, the principle should be clear – nevertheless I would appreciate a hint if you find one)

    Sources
  • Install Zalando Postgres operator

    This was a bit painful, yet I managed. Used apparently v1.6.2.

    Add helm repos

    If you pull a little trick you can install the operator using helm, just add a helm repo pointing to the github repo:

    # found here: https://git.io/J3C7S
    export ZALANDO_BASE=https://raw.githubusercontent.com/zalando/postgres-operator
    helm repo add zalando-pg $ZALANDO_BASE/master/charts/postgres-operator/
    helm repo add zalando-ui $ZALANDO_BASE/master/charts/postgres-operator-ui/
    helm repo update
    

    Install postgres-operator

    To use CRD configuration (recommended) this must be present in the helm values.yaml file:

    # values.yaml - INCOMPLETE; DO NOT USE; use the one further down.
    configTarget: "OperatorConfigurationCRD"
    

    Unfortunately the helm chart is broken, and you have to re-create the default values.yaml file (see also below). Using this file you can now install the operator:

    helm upgrade -i \
    --create-namespace -n zalando-pg-operator \
    -f values.yaml \
    pg-operator \
    zalando-pg/postgres-operator
    

    Install operator-ui

    Just use default values, so no values.yaml needed.

    helm upgrade -i \
    --create-namespace -n zalando-pg-operator \
    pg-operator-ui \
    zalando-ui/postgres-operator-ui
    

    To access the service you have to do a port-forward, since there is no authentication that I know of:

    kubectl port-forward svc/pg-operator-ui-postgres-operator-ui 8081:80 -n zalando-pg
    curl localhost:8081
    

    Uninstallation

    Since it’s helm I’d assume a simple helm uninstall.

    Impressions

    • I dislike the helm chart quality.
    • I have a feeling the thing is pretty AWS specific, in the UI you can enable “ELB”s, which is AWS speak for “load balancers”
    • I really like the UI, and I like the way you see which objects are created.

    Resources

    values.yaml for helm

    The settings in the default values.yaml file do not have the correct data type and validation will fail once you try to install it. A working version can be found in this gist or below (identical contents). The file has the exact same values but in the correct data types (so a boolean is actually true and not "true", which is a string and not a bool value).

    ## INSTALL / UPGRADE:
    ##   helm upgrade -i --create-namespace -n zalando-pg pg-operator zalando/postgres-operator -f values.yaml
    
    # enable CRD configuration
    configTarget: OperatorConfigurationCRD
    
    # the following values ARE THE DEFAULT VALUES. unfortunately they are coded as
    # strings in the default values.yaml, and the verification (rightfully) complains
    # that either boolean or integer values are needed. so we have to re-include them
    # here but with the correct data type.
    # the only exceptions to this are the commented-out values, which contain integers,
    # but are needed as strings. what a mess.
    
    configGeneral:
      enable_crd_validation: true
      enable_lazy_spilo_upgrade: false
      enable_pgversion_env_var: true
      enable_shm_volume: true
      enable_spilo_wal_path_compat: false
      min_instances: -1
      max_instances: -1
      workers: 8
    
    configKubernetes:
      cluster_labels:
        application: spilo
      enable_init_containers: true
      enable_pod_antiaffinity: false
      enable_pod_disruption_budget: true
      enable_sidecars: true
      spilo_privileged: false
      spilo_allow_privilege_escalation: true
    
    #configPostgresPodResources:
    #  default_cpu_limit: 1
    
    configLoadBalancer:
      enable_master_load_balancer: false
      enable_replica_load_balancer: false
    
    configDebug:
      debug_logging: true
      enable_database_access: true
    
    configLoggingRestApi:
      api_port: 8080
      cluster_history_entries: 1000
      ring_log_lines: 100
    
    configAwsOrGcp:
      enable_ebs_gp3_migration: false
    
    configTeamsApi:
      enable_postgres_team_crd: false
      enable_teams_api: false
    
    configConnectionPooler:
      connection_pooler_max_db_connections: 60
      connection_pooler_number_of_instances: 2
      #connection_pooler_default_cpu_limit: 1
    
  • Install Crunchy Data Postgres operator

    It’s pretty simple, following the documentation, and tested with version 4.6.2 (commands super slightly adapted). Normally you might download the YAML file and adjust the installation settings in there, this is not done here (mainly because this is just a handling test).

    export CRUNCHY_BASE=https://raw.githubusercontent.com/CrunchyData/postgres-operator
    kubectl create namespace pgo
    kubectl apply -f $CRUNCHY_BASE/v4.6.2/installers/kubectl/postgres-operator.yml
    
    # install pgo binary - https://is.gd/U00wux
    curl $CRUNCHY_BASE/v4.6.2/installers/kubectl/client-setup.sh > client-setup.sh
    bash client-setup.sh
    rm client-setup.sh
    
    # THIS IS IMPORTANT
    kubectl delete job -n pgo pgo-deploy
    

    Using the pgo binary

    Every time you want to use the binary you have to port-forward to the operator container, and set PGO_APISERVER_URL:

    # keep running
    kubectl -n pgo port-forward svc/postgres-operator 8443:8443
    
    # second shell
    export PGO_APISERVER_URL="https://127.0.0.1:8443"
    pgo version
    

    Upgrading the operator (untested)

    Just apply the same manifest, but set the DEPLOY_ACTION in the YAML postgres-operator.yaml manifest to upgrade. You can do this by downloading and modifying, or just in a one-liner:

    export CRUNCHY_BASE=https://raw.githubusercontent.com/CrunchyData/postgres-operator
    export CRUNCHY_YAML=$CRUNCHY_BASE/v4.6.2/installers/kubectl/postgres-operator.yml
    curl $CRUNCHY_YAML | sed 's/value: install/value: upgrade/g' | kubectl apply -f -
    

    NOTE: If you get a huge error message you forgot to delete the job after the installation.

    Uninstalling the operator

    Like upgrade, but with the value uninstall.

    export CRUNCHY_BASE=https://raw.githubusercontent.com/CrunchyData/postgres-operator
    export CRUNCHY_YAML=$CRUNCHY_BASE/v4.6.2/installers/kubectl/postgres-operator.yml
    curl $CRUNCHY_YAML | sed 's/value: install/value: uninstall/g' | kubectl apply -f -
    

    NOTE: If you get a huge error message you forgot to delete the job after the installation.

    Afterwards clean up the remaining stuff which is created by $CRUNCHY_YAML defined above:

    kubectl delete job -n pgo pgo-deploy
    kubectl delete clusterrolebinding pgo-deployer-crb
    kubectl delete configmap pgo-deployer-cm
    kubectl delete clusterrole pgo-deployer-cr
    kubectl delete serviceaccount pgo-deployer-sa
    kubectl delete namespace pgo
    

    Impressions

    • Installing using the operator framework at operatorhub didn’t work. The framework failed to install.
    • I don’t like that the pgo binary is installed for every namespace you are using. This seems weird, it should somehow follow “standard” k8s RBAC, or the principle of kubectl contexts.
    • I also don’t like that the installation method is static and you cannot change the namespace without downloading and editing the files apparently.
    • I very much like the CLI approach, yet at the same time …
    • … it leaves the declarative “everything is a CRD / an API object” approach.

    So … mixed. Haven’t tried the databases – yet.

  • Rancher 2.4+ installation notes

    I really like Rancher. Used in v1.x, now I’m back at a point where I might need it. Also I want to pitch it to my colleagues, which means I need to have a quick and dirty setup to fool around with. The Rancher Terraform (love it) modules are huge, and I wanted to have a simpler method (which I understand more) for my first training session with the guys.

    These are my notes:

  • cert-manager too old …

    Today cert-manager stopped issuing certificates, and all requests said “insecure website”. Uncool, since this affected our Confluence and our sign-in mechanism. So let’s find out what was happening, right? Turns out cert-manager considered itself “too old” (“your ACME client is too old”, literally) and wanted to be updated.

    So far, so good. Just perform helm update cert-manager cert-manager, right?

    Wrong.

    • First, I had to upgrade to helm3. All right, I could have used helm2, but helm3 was already on here, and it seemed easy. That went (fairly) easy.
    • Then I wanted to upgrade cert-manager. Turns out for that I actually had to upgrade the running k8s version 1.12.x to 1.13.x … otherwise I’d get errors from the helm chart. That just took ages cause AKS is a bit slow.
    • Finally done I wanted to upgrade cert-manager. Until I realized a lot of stateful pods were stuck in “initialization”. Turns out that AKS had issues moving the volumes around, I still don’t know why. (Did I mention I just don’t like pretty much anything about Azure? It’s just so incredibly cumbersome to use, and nothing is where you expect it). So I had to manually mount the volumes on the host the Pod was currently on and have an open TODO now, which just sucks.
    • Finally done I wanted to upgrade cert-manager. The upgrade went just peachy, until I realized that … nothing happened. Turns out they changed pretty much all API versions and annotation keys. So I had to rewrite / upgrade all ingress annotations, update the ClusterIssuer resources and delete the now obsolete former K8S CRDs.

    And just like that I had my certificates back. Wasn’t that easy? 😀

  • Helm in a kops cluster with RBAC

    I created a K8S cluster on AWS with kops.

    I ran helm init to install tiller in the cluster.

    I ran helm list  to see if it worked.

    I got this:

    Error: configmaps is forbidden: User "system:serviceaccount:kube-system:default" \
        cannot list configmaps in the namespace "kube-system"
    

    That sucked. And google proved … reluctant. What I could figure out is:

    Causes

    • kops sets up the cluster with RBAC enabled (which is good)
    • helm (well, tiller) uses a standard role for doing things (which might be ok, at least it was with my stackpoint cluster), but in that case (for whatever reason) it did not have sufficient privileges
    • so we need to prepare some cluster admin roles for helm to use

    Fixes

    Just do exactly as it says in the helm docs 🙂 :

    • apply the RBAC yaml file which creates the kube-system/tiller service account, and binds this to the cluster-admin  role.
    • install helm with: helm init -service-account tiller

    Is that secure? Not so much. With helm you can still do anything to the cluster at all. I might get to this in a later post.

  • The state of things – technology

    It’s been a while. I am currently pretty burned out, and the work keeps getting more. This is bad. But let’s talk about some challenges right now. So this is an overview of our …

    Technical state

    We’re still using Rancher. Rancher is super cool, but has the annoying habit of completely crashing about once every two months, leading to a full cluster outage for anything between 1-3 hours. Usually about 2. I still love it, but we matured in our needs, and maybe Rancher needs time to catch up (cause our needs are sometimes a bit “special”). But the Rancher team is making great progress in the right directions, and I am fully competent that Rancher will take a place in the orchestration space. Still we’re thinking about moving to K8s, simply because so much is already there.

    We’re using Prometheus for monitoring now. Rocks. Period.

    We’re still using AWS. Many of our customers would prefer Azure Germany. If you didn’t know – Azure in Germany advertises a “Data Custodian” mode, or “Data Trustee” model, not sure how to translate this and too lazy to look it up. This means that in Germany the data centers are running the true Azure stuff, but they are actually fully operated by Deutsche Telekom.

    Advantage, you ask? Easy. When the DOJ sends one of those super secure letters to Microsoft for “give me your data”, they simply forward this to Deutsche Telekom. They will probably frame it on a wall somewhere, but I don’t think they will actually give out the data. Problem solved. (We all hope :))

    We are almost done with setting the whole cloud up using Terraform. It became a really mature project over the last year, and we are super happy with the progress it’s making. Also, with Azure in the works for us (some cusomers …) this is a cool way to just manage all with the same tooling. Infrastructure as code, eh.

    We try to migrate away from Teamcity to Jenkins. We didn’t succeed yet. Too little manpower.

    But the more interesting thing is in the next post, for me at least 😉

  • Migrate Rancher database from container to external

    I wanted to switch from an in-container database setup to an external database setup. And I didn’t know what happens when you just lose all database contents, and I thought with Docker and some tweaking that should also not be necessary. So I just migrated the databases. Here’s what I did for those interested:

    • stop rancher
    • use a container (sameersbn/mysql) to mount the rancher database content and do a mysqldump
    • import the dump into the external database (AWS RDS instance)
    • start rancher up with different parameters (use external database, as described in the official docs)

    And now the actual command lines:

    # create socket directory
    $ cd RANCHER_MYSQL_MOUNT
    $ mkdir sockets
    
    # start sameersbn/mysql to have a mysql container for dumping everything
    $ docker run -d --name temp-mysql -v $(pwd)/sockets:/var/run/mysqld -v $(pwd):/var/lib/mysql sameersbn/mysql
    
    # dump the database
    $ mysqldump -S ./sockets/mysqld.sock --add-drop-database --add-drop-table --add-drop-trigger --routines --triggers cattle > cattle.sql
    
    # restore the database in AWS / whatever
    $ mysql -u USERNAME -p -h DB_HOST DB_NAME < cattle.sq
    

    (Don’t forget to stop the sammersbn container once you’re done). I have configured puppet to start rancher. The final configuration in puppet looks like this:

    ::docker::run { 'rancher-master':
      image   => 'rancher/server',
      ports   => "${rancher_port}:8080",
      volumes => [],
      env     =>  [
        "CATTLE_DB_CATTLE_MYSQL_HOST=${db_host}",
        "CATTLE_DB_CATTLE_MYSQL_NAME=${db_name}",
        "CATTLE_DB_CATTLE_MYSQL_PORT=${db_port}",
        "CATTLE_DB_CATTLE_MYSQL_USERNAME=${db_user}",
        "CATTLE_DB_CATTLE_MYSQL_PASSWORD=${db_pass}",
      ],
    }
    

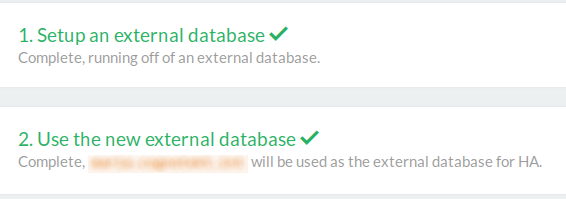
    Restart, and it seems to be working just fine. To check go to http://RANCHER_URL/admin/ha (yes, we still use HTTP internally, it will change), and you should see this:

    setup screen

    Nice.

  • Rancher IAM role

    Rancher can create instances on EC2. If you want to define a dedicated IAM user for this, refer to the Amazon docs for the a profile template.

    Unfortunately the first thing you get when using those permissions in rancher is “You are not authorized”. Great. I’ll update this when I know the correct permissions.

    (Source: Rancher docs)