Author: penguin

  • Databases with dokku

    This is part 2 of a couple of blog posts about dokku, a amazing little Heroku clone.

    In the previous post I showed how to set up Dokku on a DigitalOcean droplet, and deployed a little hello-world container with a single git push. The reason why I wanted dokku thoug was the need of a database. As said – hosting comes cheap, databases usually come either expensive or with limited flexibility, or just too annoying configuration effort.

    Dokku is the perferct middle ground. Let’s see why.

    For me it was the existing postgres plugin which you can simply install and use. The whole process is incredibly easy, takes wbout two commands, and looks like this (let’s assume our “hello world” container uses a database):

    $ sudo dokku plugin:install https://github.com/dokku/dokku-postgres.git postgres
    

    That’s it, again.

    $ dokku postgres:create hello-world
    
    dokku postgres:create hello-world
    Waiting for container to be ready
    Creating container database Securing connection to database
    =====> Postgres container created: hello-world
    =====> Container Information
           Config dir: /var/lib/dokku/services/postgres/hello-world/config
           Data dir: /var/lib/dokku/services/postgres/hello-world/data
           Dsn: postgres://postgres:bd6b0725d710bb5a662bb628eee787b1@dokku-postgres-hello-world:5432/hello_world
           Exposed ports: -
           Id: 785ef252c748ed85739d1d6ad375a1e1bd66e925ac79358e9ffaa30ab852d6c0
           Internal ip: 172.17.0.9
           Links: -
           Service root: /var/lib/dokku/services/postgres/hello-world
           Status: running
           Version: postgres:10.2
    
    $ docker ps
    
    CONTAINER ID   IMAGE                      COMMAND                  CREATED         STATUS         PORTS      NAMES
    cc99cccacf2c   dokku/hello-world:latest   "/bin/sh -c 'php-fpm…"   2 minutes ago   Up 2 minutes   80/tcp     hello-world.web.1
    785ef252c748   postgres:10.2              "docker-entrypoint.s…"   5 minutes ago   Up 5 minutes   5432/tcp   dokku.postgres.hello-world
    [...]
    

    This creates a database container with postgres 10.2, as you can see. You can influence a lot of behavior by using environment variables, see the GitHub page for more info.

    Then you link the container to the running app:

    $ dokku postgres:link hello-world hello-world
    -----> Setting config vars
           DATABASE_URL: postgres://postgres:bd6b0725d710bb5a662bb628eee787b1@dokku-postgres-hello-world:5432/hello_world
    -----> Restarting app hello-world
    -----> Releasing hello-world (dokku/hello-world:latest)...
    -----> Deploying hello-world (dokku/hello-world:latest)...
    -----> Attempting to run scripts.dokku.predeploy from app.json (if defined)
    -----> No Procfile found in app image
    -----> DOKKU_SCALE file found (/home/dokku/hello-world/DOKKU_SCALE)
    =====> web=1
    -----> Attempting pre-flight checks
           For more efficient zero downtime deployments, create a file CHECKS.
           See http://dokku.viewdocs.io/dokku/deployment/zero-downtime-deploys/ for examples
           CHECKS file not found in container: Running simple container check...
    -----> Waiting for 10 seconds ...
    -----> Default container check successful!
    -----> Running post-deploy
    -----> Configuring hello-world.my-paas.for-myself.com...(using built-in template)
    -----> Creating http nginx.conf
    -----> Running nginx-pre-reload Reloading nginx
    -----> Setting config vars DOKKU_APP_RESTORE: 1
    -----> Found previous container(s) (14c349cb496d) named hello-world.web.1
    =====> Renaming container (14c349cb496d) hello-world.web.1 to hello-world.web.1.1535285386
    =====> Renaming container (cc99cccacf2c) serene_bassi to hello-world.web.1
    -----> Attempting to run scripts.dokku.postdeploy from app.json (if defined)
    -----> Shutting down old containers in 60 seconds
    =====> 14c349cb496d95cc4be1833f2e7f6ef2bef099a37c2a22cd4dcdb542f09bea0f
    =====> Application deployed:
           http://hello-world.my-paas.for-myself.com
    

    And done.

    What happened? You have now the environment variable $DATABASE_URL set in the hello-world app, that’s why the restart was necessary (which you can postpone, if you want, but you probably need it now, right?).

    Let’s check:

    $ docker exec -ti hello-world.web.1 /bin/sh
    
    [now in the container]
    
    # env | grep DATABASE
    DATABASE_URL=postgres://postgres:bd6b0725d710bb5a662bb628eee787b1@dokku-postgres-hello-world:5432/hello_world
    

    That’s it. Super easy. Now if you’re using Django, you could use kennethreitz/dj-database-url to automatically parse and use it, and you’re done. (Probably every framework has something similar, so just have a look).

  • Build your own PaaS with Dokku

    I was looking for some “play” deployment method for a couple of things I want to try out. Most of them require a database. And it should be cheap, cause I don’t have any load on them and don’t earn any money, so I don’t want to spend basically no money if possible. The usual suspects are too expensive – AWS, Heroku, etc.

    So I looked around and found Dokku.

    Dokku is a set of – hang on – shell scripts – which basically emulate Heroku on a machine of your own. It’s integrated with Digital Ocean droplets out of the box, if you want it. And the whole thing is 5 € / month, which is perfect. It also integrates with a Dockerfile based deployment, so you do git push and everything just works.

    It’s amazing.

    This is how you get started. But before you can get started, you need a domain you control, either on AWS or any other hoster. This is for routing traffic to your deployments later. You also need a public SSH key, or better a public / private key pair. Once you have both you can …

    1. create a Digital Ocean account, and …
    2. add your SSH public key to your account, and …
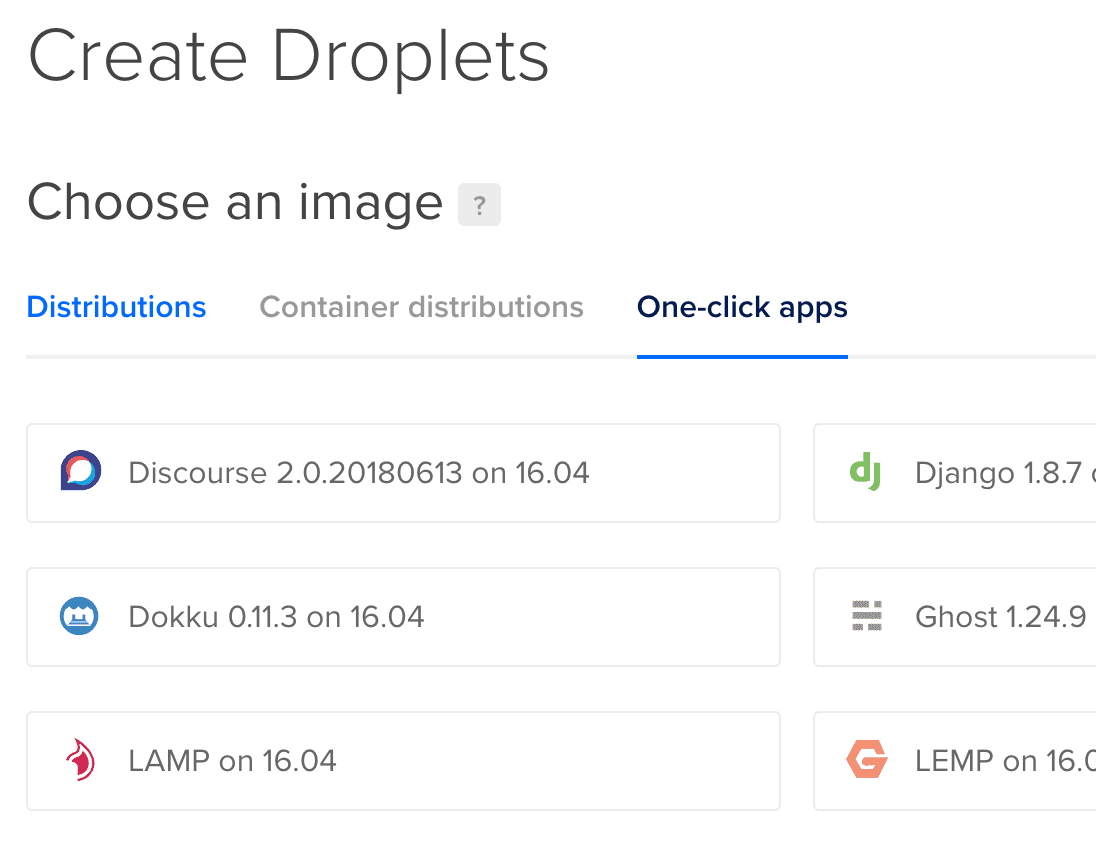
    3. in that account, create a new droplet with a “Dokku” image preinstalled.
    4. Wait until the droplet finished provisioning.

    create new droplet

    While the droplet is being created, you can also create a project locally to test it later:

    $ mkdir dokku-test
    $ cd dokku-test
    $ git init
    $ echo "FROM tutum/hello-world" > Dockerfile
    $ git add Dockerfile
    $ git commit -m "Initial commit"
    

    In this little test project we only create a Dockerfile from an hello-world image which displays “Hello world” in a browser so we can verify it worked.

    Once the droplet is done, you can start setting up your personal little PaaS. First, you have to configure your DNS. We will set up a wildcard entry for our deployments, and a non-wildcard entry for git. Let’s assume your domain is for-myself.com, then you would add …

    • my-paas.for-myself.com , type “A” (or “AAAA” if you are IPv6) to your droplet IP
    • *.my-paas.for-myself.com just the same

    Then you SSH into your droplet, and create your dokku project. (This is something you have to do for every project). All you have to do for this is:

    $ ssh root@DROPLET_IP
    ~# dokku apps:create hello-world
    -----> Creating hello-world... done
    ~# _
    

    Done.

    Now you configure a git remote URL for your project, and push it:

    $ git remote add dokku dokku@my-paas.for-myself.com:hello-world
    

    Again – done. If you push your project now (assuming DNS is already set), everything should happen automagically:

    $ git push --set-upstream dokku master
    X11 forwarding request failed
    Enumerating objects: 3, done.
    Counting objects: 100% (3/3), done.
    Writing objects: 100% (3/3), 241 bytes | 241.00 KiB/s, done.
    Total 3 (delta 0), reused 0 (delta 0)
    -----> Cleaning up...
    -----> Building hello-world from dockerfile...
    remote: build context to Docker daemon  2.048kB
    Step 1/1 : FROM tutum/hello-world
    latest: Pulling from tutum/hello-world
    658bc4dc7069: Pulling fs layer
    [... TRUNCATED ...]
    983d35417974: Pull complete
    Digest: sha256:0d57def8055178aafb4c7669cbc25ec17f0acdab97cc587f30150802da8f8d85
    Status: Downloaded newer image for tutum/hello-world:latest
     ---> 31e17b0746e4
    Successfully built 31e17b0746e4
    Successfully tagged dokku/hello-world:latest
    -----> Setting config vars
           DOKKU_DOCKERFILE_PORTS:  80/tcp
    -----> Releasing hello-world (dokku/hello-world:latest)...
    -----> Deploying hello-world (dokku/hello-world:latest)...
    -----> Attempting to run scripts.dokku.predeploy from app.json (if defined)
    -----> No Procfile found in app image
    -----> DOKKU_SCALE file not found in app image. Generating one based on Procfile...
    -----> New DOKKU_SCALE file generated
    =====> web=1
    -----> Attempting pre-flight checks
           For more efficient zero downtime deployments, create a file CHECKS.
           See http://dokku.viewdocs.io/dokku/deployment/zero-downtime-deploys/ for examples
           CHECKS file not found in container: Running simple container check...
    -----> Waiting for 10 seconds ...
    -----> Default container check successful!
    -----> Running post-deploy
    -----> Creating new /home/dokku/hello-world/VHOST...
    -----> Setting config vars
           DOKKU_PROXY_PORT_MAP:  http:80:80
    -----> Configuring hello-world.my-paas.for-myself.com...(using built-in template)
    -----> Creating http nginx.conf
    -----> Running nginx-pre-reload
           Reloading nginx
    -----> Setting config vars
           DOKKU_APP_RESTORE:  1
    =====> Renaming container (14c349cb496d) amazing_snyder to hello-world.web.1
    -----> Attempting to run scripts.dokku.postdeploy from app.json (if defined)
    =====> Application deployed:
           http://hello-world.my-paas.for-myself.com
    
    To my-paas.for-myself.com:hello-world
     * [new branch]      master -> master
    Branch 'master' set up to track remote branch 'master' from 'dokku'.
    

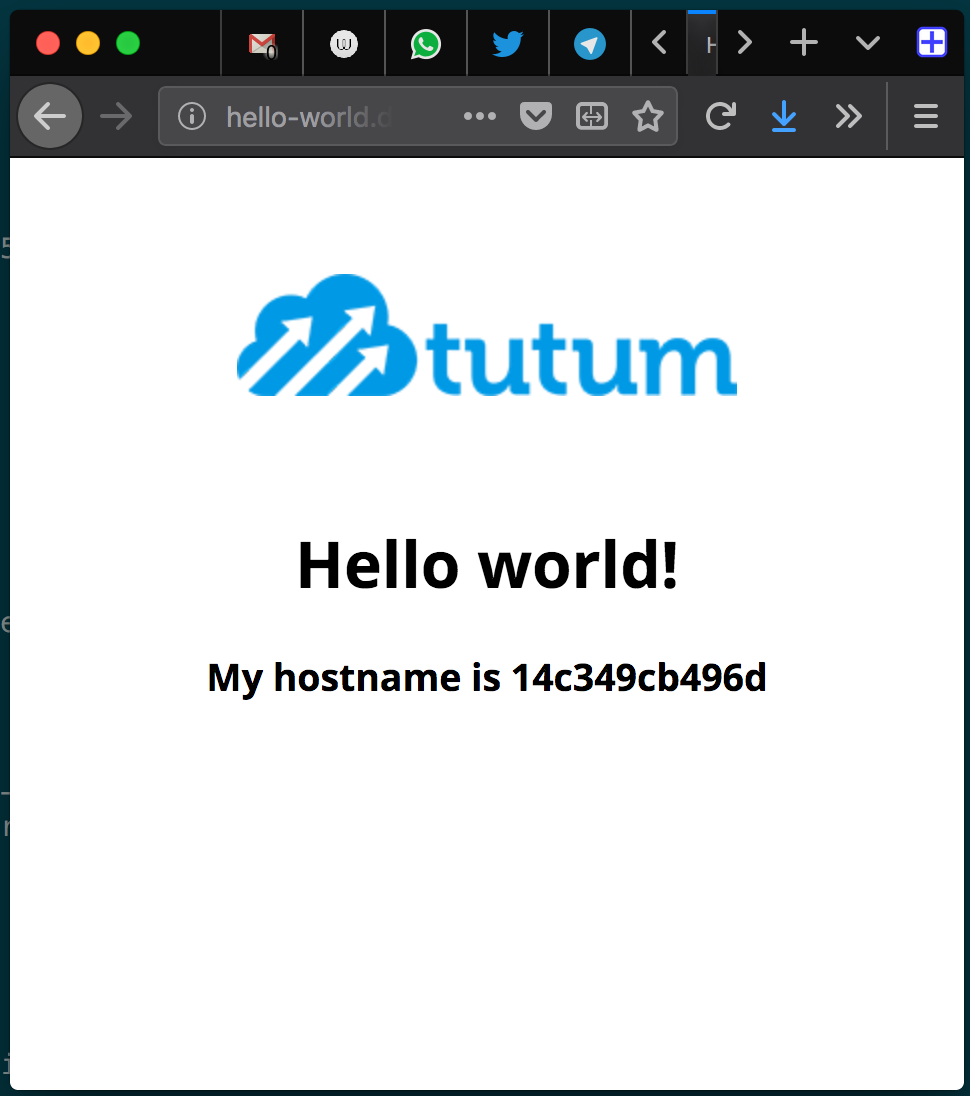
    And if you open your URL now (which is hello-world.my-paas.for-myself.com) you should see this image:

    browser display of deployed example site

    Now, for 5 € / month you get:

    • A heroku-like, no-nonsense, fully automated, git-based deployment platform
    • A server which you control (and have to maintain, okay, but on which you can deploy …)
    • A database (or many of them – dokku provides great integration for databases btw; more on that in another post)
    • Publicly reachable deployments (for customers, testing, whatever)
    • Let’s Encrypt certificates (dokku provides support for these as well, again more in a later post)
    • And for 1 € more (it’s always 20% of the base price) you get backups of your system)

    That’s absolutely incredible. Oh, and did I mention that the maintainers are not only friendly, but also super responsive and incredibly helpful on Slack?

  • Helm in a kops cluster with RBAC

    I created a K8S cluster on AWS with kops.

    I ran helm init to install tiller in the cluster.

    I ran helm list  to see if it worked.

    I got this:

    Error: configmaps is forbidden: User "system:serviceaccount:kube-system:default" \
        cannot list configmaps in the namespace "kube-system"
    

    That sucked. And google proved … reluctant. What I could figure out is:

    Causes

    • kops sets up the cluster with RBAC enabled (which is good)
    • helm (well, tiller) uses a standard role for doing things (which might be ok, at least it was with my stackpoint cluster), but in that case (for whatever reason) it did not have sufficient privileges
    • so we need to prepare some cluster admin roles for helm to use

    Fixes

    Just do exactly as it says in the helm docs 🙂 :

    • apply the RBAC yaml file which creates the kube-system/tiller service account, and binds this to the cluster-admin  role.
    • install helm with: helm init -service-account tiller

    Is that secure? Not so much. With helm you can still do anything to the cluster at all. I might get to this in a later post.

  • GitLab spot runners & Puppet

    We are on AWS with GitLab. For ease of use, and because our build hosts degenerate for some reason (network issues), we decided to use spot instances with GitLab.

    The journey was all but easy. Here’s why.

    GitLab Runner configuration complaints

    First: The process

    To configure GitLab runner, you have to …

    • install GitLab,
    • write down the runner registration token,
    • start a runner,
    • manually a registration command using above token.

    That registration command will then modify the config file of the runner. That is important because you can’t just write a static, read-only config file and start the runner. This is not possible for two reasons:

    • when you execute the registration command, the runner wants to modify the config file to add yet another token (its “personal” token, not the general registration secret), so it must not be read-only
    • the runner has to be registered, so just starting it will do … nothing.

    That is in my eyes a huge design flaw, which undoubtedly has its reasons, but it still – sorry – sucks IMHO.

    Second: The configuration

    You can configure pretty much everything in the config file. But once the runner registers, the registration process for some reason appends a completely new config to any existing config file, so that … the state is weird. It works, but it looks fucked, and feels fucked.

    You can also set all configuration file entries using the gitlab-runner register  command. Well, not all: The global parameters (like, for example, log_level  or concurrent ) cannot be set. Those have to be in a pre-existing config file, so you need both – the file and the registration command, which will look super ugly in a very short time.

    Especially if you still use Puppet to manage the runners, cause then you just can’t just restart the runner once the config file changes. Because it will always change, because of above reasons.

    Third: The AWS permission documentation

    Another thing is that the list of AWS permissions the runner needs in order to create spot instances is nowhere to be found. Hint: EC2FullAccess  and S3FullAccess is not enough. We are using admin permissions right now, until we figured it out. Not nice.

    Our solution

    For this we’re still using Puppet (our K8S migration is still ongoing), and our solution so far looks like this:

    • Create a config file with puppet next to the designated config file location,
    • containing only global parameters.
    • The file has a puppet hook which triggers an exec that deletes the “final” config file if the puppet-created one has changed.
    • Start the GitLab runner.
    • Perform a “docker exec” which registers the runner in GitLab.
    • The “unless” contains a check that skips execution if the final config file is present.
    • The register  command sets all configuration values except the global ones. Like said above, the command appends all non-global config settings to any existing config file.

    Some code

    #
    # CONFIG VALUES
    #
    
    # the configuration for the build runner running on the same host, which
    # manages the autoscaling-based spot-instance-allocation
    global::concurrent: "5"
    
    registration_command::docker_image: "ubuntu:artful"
    registration_command::token: "our-token"
    registration_command::url: "https://our.gitlab.server"
    
    runners::concurrency: "1"
    runners::limit: "10"
    runners::name: "spot-runner"
    
    cache::bucket_location: "eu-central-1"
    cache::bucket_name: "our-cache-bucket"
    cache::shared: "true"
    cache::type: "s3"
    
    machine::idle_nodes: "0"
    machine::idle_time: "1800"
    machine::max_builds: "10"
    machine::machine_name: "standard-%s"
    
    machine::option::access_key: "%{hiera('ops::gitlab::spotrunner::id')}"
    machine::option::ami: "ami-44d48eaf"
    machine::option::block_minutes: "60"
    machine::option::iam_profile: "gitlab-runner"
    machine::option::instance_type: "m4.xlarge"
    machine::option::private_address_only: "true"
    machine::option::private_address: "true"
    machine::option::region: "eu-central-1"
    machine::option::secret_key: "%{hiera('ops::gitlab::spotrunner::secret')}"
    machine::option::spot_instances: "true"
    machine::option::spot_price: "0.2"
    machine::option::subnet_id: "subnet-subbb"
    machine::option::tags: "stage,prod"
    machine::option::vpc_id: "vpc-veepeecee"
    
    machine::option::other: >
      --machine-machine-options amazonec2-security-group=cognodev3_sg_docker_machine
      --machine-machine-options amazonec2-security-group=cognodev3-SG0-shubdu
      --machine-machine-options amazonec2-security-group=cognodev3-SG1-shalala
      --machine-machine-options amazonec2-security-group=cognodev3-SG2-shubndibndu
      --machine-machine-options engine-insecure-registry=some.internal.repo
      --machine-machine-options engine-insecure-registry=other.internal.repo:5000
    
    #
    # START
    #
    
    ## GITLAB SPOT INSTANCE RUNNER
    
    create::docker_containers:
      # gitlab spot runner
      gitlab-spot-runner:
        image: gitlab/gitlab-runner:latest
        pull_on_start: true
        volumes:
          - /var/docker-apps/gitlab-spot-runner:/etc/gitlab-runner
          - /var/run/docker.sock:/var/run/docker.sock
          - /var/run/.docker:/root/.docker
    
    create::files:
      "/var/docker-apps/gitlab-spot-runner/config.toml.puppet":
        ensure: present
        notify: "Service[docker-gitlab-spot-runner]"
        content: |
          concurrent = %{hiera('global::concurrent')}
          check_interval = 0
    
    create::execs:
      "delete config file":
        command: rm /etc/gitlab-runner/config.toml
        path: /bin:/usr/bin:/sbin:/usr/sbin
        refreshonly: true
        subscribe: File[/etc/gitlab-runner/config.toml.puppet]
        before: Docker::Exec[register-spot-runner]
    
    # why are we doing this?
    # because gitlab WANTS to re-write the config file. and we CANNOT set "global"
    # parameters (e.g. "log_level", "concurrent") in using the registration
    # command line.
    # so, we ...
    #    * create a config "config.toml.puppet" file with ONLY global params
    #    * rm the config.toml file in case of changes to the .puppet file
    #    * re-execute registration using ALL other config settings when the
    #      config.toml file is no longer present
    # we do this because:
    #    * we can't watch the toml file for changes, cause the runner WILL change
    #      it
    #    * but we WANT to set global parameters, and luckily the runner seems
    #      to just append all non-global settings to an existing config file
    #      on registration.
    # THIS FUCKING SUCKS. I know. but I really have not found another way (abk)
    
    create::docker_execs:
      "register-spot-runner":
        detach: false
        container: gitlab-spot-runner
        tty: true
        command: >-
          /bin/bash -c 'cp /etc/gitlab-runner/config.toml.puppet /etc/gitlab-runner/config.toml &&
          gitlab-runner register --non-interactive
          --registration-token %{hiera('registration_command::token')}
          --url %{hiera('registration_command::url')}
          --executor "docker+machine"
          --docker-image %{hiera('registration_command::docker_image')}
          --locked=false
          --run-untagged
          --docker-volumes /var/run/docker.sock:/var/run/docker.sock
          --name %{hiera('runners::name')}
          --limit %{hiera('runners::limit')}
          --request-concurrency %{hiera('runners::concurrency')}
          --cache-cache-shared=%{hiera('cache::shared')}
          --cache-s3-bucket-location %{hiera('cache::bucket_location')}
          --cache-s3-bucket-name %{hiera('cache::bucket_name')}
          --cache-type %{hiera('cache::type')}
          --machine-machine-driver amazonec2
          --machine-idle-nodes %{hiera('machine::idle_nodes')}
          --machine-idle-time  %{hiera('machine::idle_time')}
          --machine-machine-name %{hiera('machine::machine_name')}
          --machine-max-builds %{hiera('machine::max_builds')}
          --machine-machine-options amazonec2-private-address-only=%{hiera('machine::option::private_address_only')}
          --machine-machine-options amazonec2-use-private-address=%{hiera('machine::option::private_address')}
          --machine-machine-options amazonec2-region=%{hiera('machine::option::region')}
          --machine-machine-options amazonec2-access-key=%{hiera('machine::option::access_key')}
          --machine-machine-options amazonec2-ami=%{hiera('machine::option::ami')}
          --machine-machine-options amazonec2-block-duration-minutes=%{hiera('machine::option::block_minutes')}
          --machine-machine-options amazonec2-iam-instance-profile=%{hiera('machine::option::iam_profile')}
          --machine-machine-options amazonec2-instance-type=%{hiera('machine::option::instance_type')}
          --machine-machine-options amazonec2-request-spot-instance=%{hiera('machine::option::spot_instances')}
          --machine-machine-options amazonec2-secret-key=%{hiera('machine::option::secret_key')}
          --machine-machine-options amazonec2-spot-price=%{hiera('machine::option::spot_price')}
          --machine-machine-options amazonec2-subnet-id=%{hiera('machine::option::subnet_id')}
          --machine-machine-options amazonec2-tags=%{hiera('machine::option::tags')}
          --machine-machine-options amazonec2-vpc-id=%{hiera('machine::option::vpc_id')}
          %{hiera('machine::option::other')}'
        unless: test -f /etc/gitlab-runner/config.toml
        require: Service[docker-gitlab-spot-runner]
    

    Does this look ugly? You bet.

    Should this be a puppet module? Most probably.

    Did I foresee this? Nope.

    Am I completely fed up? Yes.

    Is this stuff I want to do? No.

    Does it work?

    … Yes (at least … 🙂 )

    Remarks

    If you wander what all those create::THING  entries are – it’s this:

    $files = hiera_hash('create::files', {})
    if ! empty($files) {
      create_resources('file', $files)
    }
    

    We have an awful lot of those, cause then we can do a lot of stuff in the config YAMLs and don’t need to go in puppet DSL code.
  • Mac three finger gestures in browsers

    Well, I love my three-finger-jump-to-top gesture in Firefox. It was gone.

    It took me about 2h to get it back by googling. And I blog so I don’t forget.

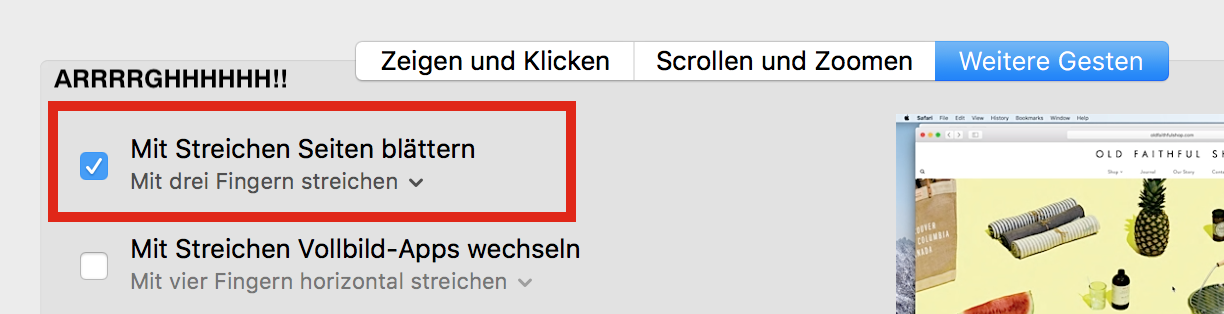
    Here’s where I should look next time straight away: System setting – Trackpad – rightmost tab – first setting.

    osx system settings for three finger swipes

  • Arch followup actions

    Updates:

    • 2022-06-23 | add networking, update packages, add GDM

    Overview

    Once you’ve installed Arch Linux, a couple of things are … nice. But very basic. Let’s get out of basic 😉 .

    Set up networking

    Just do the same as described in the installation post.

    Then, we set up IWD as backend for NetworkManger (NOTE: experimental!).

    ### FILE: /etc/NetworkManager/conf.d/wifi_backend.conf ###
    [device]
    wifi.backend=iwd
    

    Create user

    If you didn’t do it yet, create your user.

    useradd -m -G wheel USERNAME
    passwd USERNAME
    

    You should have sudo installed, so do this:

    # if you are really lazy and insecure
    echo "%wheel ALL=(ALL:ALL) NOPASSWD: ALL" >> /etc/sudoers.d/wheel
    
    # use this.
    echo "%wheel ALL=(ALL:ALL) ALL" >> /etc/sudoers.d/wheel
    

    Now log in as this user and check if you can become root by typing sudo -i.

    CLI packages

    Some CLI “apps”:

    pacman -S ack dnsmasq git ripgrep vim zsh git base-devel man-db man-pages
    

    Install yay (AUR helper)

    Remember: Do this as your “normal” user!

    mkdir /tmp/yay
    cd /tmp/yay
    
    # from here stolen from yay's github page:
    # https://github.com/Jguer/yay#source
    git clone https://aur.archlinux.org/yay-bin.git
    cd yay-bin
    makepkg -si
    

    Install UI

    And here it goes for UI and UI-related things:

    pacman -S gnome gnome-extra gnome-control-center \
              cups network-manager-applet \
              firefox
    

    Now some AUR packages:

    yay -S vscodium-bin
    

    Configurations

    For network manager, I prefer dnsmasq as the tool of choice, especially when using VPN connections:

    ### FILE: /etc/NetworkManager/conf.d/dns.conf ###
    [Main]
    dns=dnsmasq
    

    Enable services

    # enable
    systemctl enable iwd
    systemctl enable NetworkManager
    systemctl enable org.cups.cupsd
    
    # start
    systemctl start iwd
    systemctl start NetworkManager
    systemctl start org.cups.cupsd
    
    # to boot into GNOME
    systemctl enable gdm
    

    Some troubleshooting tricks

    Gnome-terminal does not start

    Set the locale, using “gnome control center”, and then re-login. (Source)

  • Python & Visual Studio code

    The official python plugin claims that the interpreters of Pipenv are automatically found.

    They are not.

    At least not on my machine.

    Here’s how you set them.

  • Arch linux + yubikeys

    To use “ykman” for arch linux, you do this:

    $ yaourt -S yubikey-manager pcsclite                 # THESE PACKAGES
    [...]
    $ systemctl start pcscd                              # START SERVICE
    $ ykman info                                         # TEST
    Device type: YubiKey NEO
    Serial number: 0123456
    Firmware version: 3.4.3
    Enabled connection(s): OTP+U2F+CCID
    
    Device capabilities:
        OTP:    Enabled
        U2F:    Enabled
        CCID:   Enabled
        OPGP:   Enabled
        PIV:    Enabled
        OATH:   Enabled
    $ _
    

    Sounds easy? Still had to google the things.

  • Ugly ligatures in Linux

    Unfortunately boohomil went off grid. I still haven’t replicated his config fully. And it still sucks.

    One more step was fixing those super-ugly ligatures in Linux. Works at least in LibreOffice (just restart the app to see changes).

  • crontab and nano

    Ever used update-alternatives to switch everything to vim and … crontab -e still used nano?

    Well, I had this. I found the answer:

    select-editor