Category: Other

  • Build your own PaaS with Dokku

    I was looking for some “play” deployment method for a couple of things I want to try out. Most of them require a database. And it should be cheap, cause I don’t have any load on them and don’t earn any money, so I don’t want to spend basically no money if possible. The usual suspects are too expensive – AWS, Heroku, etc.

    So I looked around and found Dokku.

    Dokku is a set of – hang on – shell scripts – which basically emulate Heroku on a machine of your own. It’s integrated with Digital Ocean droplets out of the box, if you want it. And the whole thing is 5 € / month, which is perfect. It also integrates with a Dockerfile based deployment, so you do git push and everything just works.

    It’s amazing.

    This is how you get started. But before you can get started, you need a domain you control, either on AWS or any other hoster. This is for routing traffic to your deployments later. You also need a public SSH key, or better a public / private key pair. Once you have both you can …

    1. create a Digital Ocean account, and …
    2. add your SSH public key to your account, and …
    3. in that account, create a new droplet with a “Dokku” image preinstalled.
    4. Wait until the droplet finished provisioning.
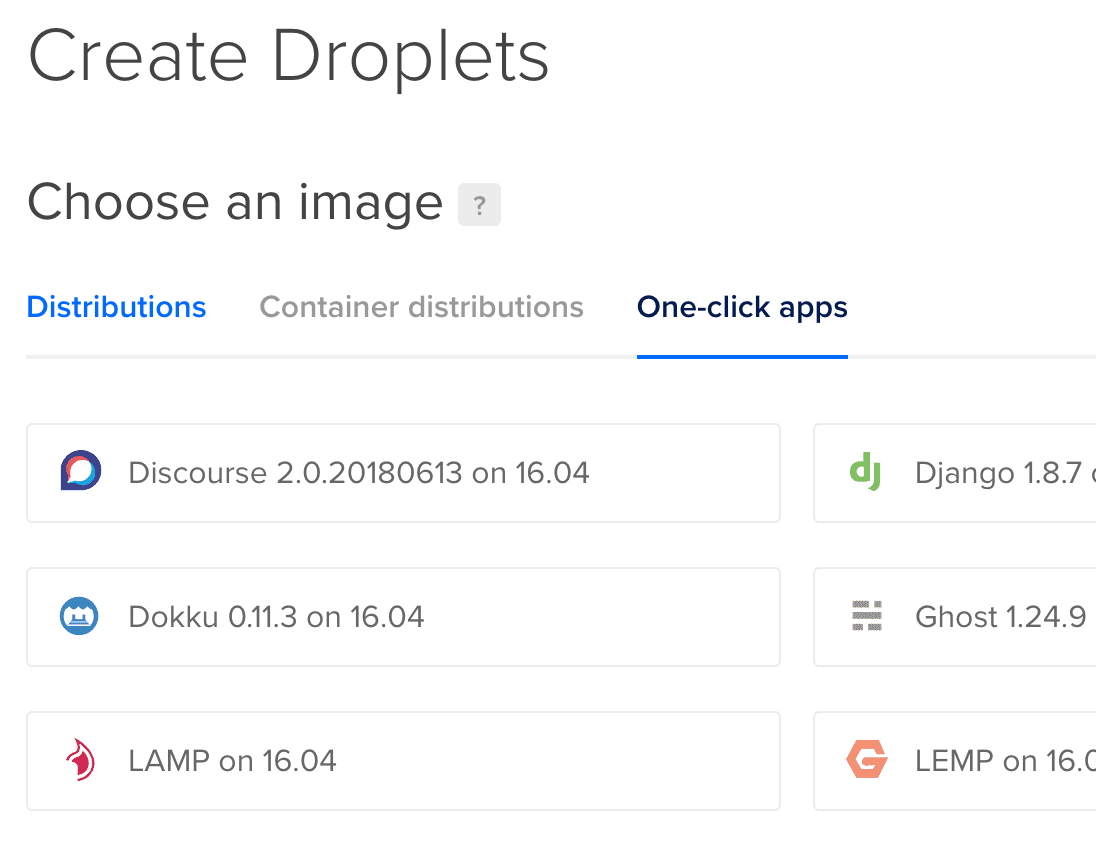
    create new droplet

    While the droplet is being created, you can also create a project locally to test it later:

    $ mkdir dokku-test
    $ cd dokku-test
    $ git init
    $ echo "FROM tutum/hello-world" > Dockerfile
    $ git add Dockerfile
    $ git commit -m "Initial commit"
    

    In this little test project we only create a Dockerfile from an hello-world image which displays “Hello world” in a browser so we can verify it worked.

    Once the droplet is done, you can start setting up your personal little PaaS. First, you have to configure your DNS. We will set up a wildcard entry for our deployments, and a non-wildcard entry for git. Let’s assume your domain is for-myself.com, then you would add …

    • my-paas.for-myself.com , type “A” (or “AAAA” if you are IPv6) to your droplet IP
    • *.my-paas.for-myself.com just the same

    Then you SSH into your droplet, and create your dokku project. (This is something you have to do for every project). All you have to do for this is:

    $ ssh root@DROPLET_IP
    ~# dokku apps:create hello-world
    -----> Creating hello-world... done
    ~# _
    

    Done.

    Now you configure a git remote URL for your project, and push it:

    $ git remote add dokku dokku@my-paas.for-myself.com:hello-world
    

    Again – done. If you push your project now (assuming DNS is already set), everything should happen automagically:

    $ git push --set-upstream dokku master
    X11 forwarding request failed
    Enumerating objects: 3, done.
    Counting objects: 100% (3/3), done.
    Writing objects: 100% (3/3), 241 bytes | 241.00 KiB/s, done.
    Total 3 (delta 0), reused 0 (delta 0)
    -----> Cleaning up...
    -----> Building hello-world from dockerfile...
    remote: build context to Docker daemon  2.048kB
    Step 1/1 : FROM tutum/hello-world
    latest: Pulling from tutum/hello-world
    658bc4dc7069: Pulling fs layer
    [... TRUNCATED ...]
    983d35417974: Pull complete
    Digest: sha256:0d57def8055178aafb4c7669cbc25ec17f0acdab97cc587f30150802da8f8d85
    Status: Downloaded newer image for tutum/hello-world:latest
     ---> 31e17b0746e4
    Successfully built 31e17b0746e4
    Successfully tagged dokku/hello-world:latest
    -----> Setting config vars
           DOKKU_DOCKERFILE_PORTS:  80/tcp
    -----> Releasing hello-world (dokku/hello-world:latest)...
    -----> Deploying hello-world (dokku/hello-world:latest)...
    -----> Attempting to run scripts.dokku.predeploy from app.json (if defined)
    -----> No Procfile found in app image
    -----> DOKKU_SCALE file not found in app image. Generating one based on Procfile...
    -----> New DOKKU_SCALE file generated
    =====> web=1
    -----> Attempting pre-flight checks
           For more efficient zero downtime deployments, create a file CHECKS.
           See http://dokku.viewdocs.io/dokku/deployment/zero-downtime-deploys/ for examples
           CHECKS file not found in container: Running simple container check...
    -----> Waiting for 10 seconds ...
    -----> Default container check successful!
    -----> Running post-deploy
    -----> Creating new /home/dokku/hello-world/VHOST...
    -----> Setting config vars
           DOKKU_PROXY_PORT_MAP:  http:80:80
    -----> Configuring hello-world.my-paas.for-myself.com...(using built-in template)
    -----> Creating http nginx.conf
    -----> Running nginx-pre-reload
           Reloading nginx
    -----> Setting config vars
           DOKKU_APP_RESTORE:  1
    =====> Renaming container (14c349cb496d) amazing_snyder to hello-world.web.1
    -----> Attempting to run scripts.dokku.postdeploy from app.json (if defined)
    =====> Application deployed:
           http://hello-world.my-paas.for-myself.com
    
    To my-paas.for-myself.com:hello-world
     * [new branch]      master -> master
    Branch 'master' set up to track remote branch 'master' from 'dokku'.
    

    And if you open your URL now (which is hello-world.my-paas.for-myself.com) you should see this image:
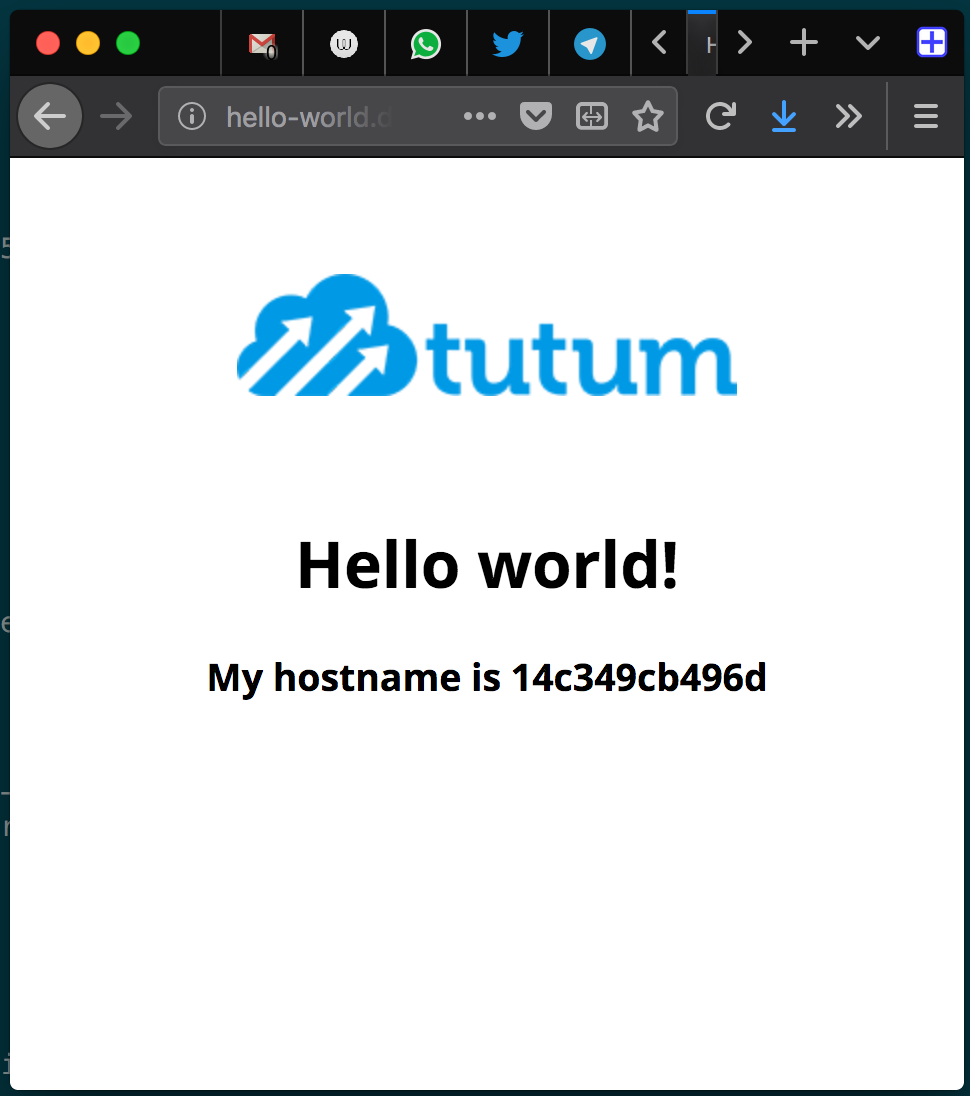
    browser display of deployed example site

    Now, for 5 € / month you get:

    • A heroku-like, no-nonsense, fully automated, git-based deployment platform
    • A server which you control (and have to maintain, okay, but on which you can deploy …)
    • A database (or many of them – dokku provides great integration for databases btw; more on that in another post)
    • Publicly reachable deployments (for customers, testing, whatever)
    • Let’s Encrypt certificates (dokku provides support for these as well, again more in a later post)
    • And for 1 € more (it’s always 20% of the base price) you get backups of your system)

    That’s absolutely incredible. Oh, and did I mention that the maintainers are not only friendly, but also super responsive and incredibly helpful on Slack?

  • GitLab spot runners & Puppet

    We are on AWS with GitLab. For ease of use, and because our build hosts degenerate for some reason (network issues), we decided to use spot instances with GitLab.

    The journey was all but easy. Here’s why.

    GitLab Runner configuration complaints

    First: The process

    To configure GitLab runner, you have to …

    • install GitLab,
    • write down the runner registration token,
    • start a runner,
    • manually a registration command using above token.

    That registration command will then modify the config file of the runner. That is important because you can’t just write a static, read-only config file and start the runner. This is not possible for two reasons:

    • when you execute the registration command, the runner wants to modify the config file to add yet another token (its “personal” token, not the general registration secret), so it must not be read-only
    • the runner has to be registered, so just starting it will do … nothing.

    That is in my eyes a huge design flaw, which undoubtedly has its reasons, but it still – sorry – sucks IMHO.

    Second: The configuration

    You can configure pretty much everything in the config file. But once the runner registers, the registration process for some reason appends a completely new config to any existing config file, so that … the state is weird. It works, but it looks fucked, and feels fucked.

    You can also set all configuration file entries using the gitlab-runner register  command. Well, not all: The global parameters (like, for example, log_level  or concurrent ) cannot be set. Those have to be in a pre-existing config file, so you need both – the file and the registration command, which will look super ugly in a very short time.

    Especially if you still use Puppet to manage the runners, cause then you just can’t just restart the runner once the config file changes. Because it will always change, because of above reasons.

    Third: The AWS permission documentation

    Another thing is that the list of AWS permissions the runner needs in order to create spot instances is nowhere to be found. Hint: EC2FullAccess  and S3FullAccess is not enough. We are using admin permissions right now, until we figured it out. Not nice.

    Our solution

    For this we’re still using Puppet (our K8S migration is still ongoing), and our solution so far looks like this:

    • Create a config file with puppet next to the designated config file location,
    • containing only global parameters.
    • The file has a puppet hook which triggers an exec that deletes the “final” config file if the puppet-created one has changed.
    • Start the GitLab runner.
    • Perform a “docker exec” which registers the runner in GitLab.
    • The “unless” contains a check that skips execution if the final config file is present.
    • The register  command sets all configuration values except the global ones. Like said above, the command appends all non-global config settings to any existing config file.

    Some code

    #
    # CONFIG VALUES
    #
    
    # the configuration for the build runner running on the same host, which
    # manages the autoscaling-based spot-instance-allocation
    global::concurrent: "5"
    
    registration_command::docker_image: "ubuntu:artful"
    registration_command::token: "our-token"
    registration_command::url: "https://our.gitlab.server"
    
    runners::concurrency: "1"
    runners::limit: "10"
    runners::name: "spot-runner"
    
    cache::bucket_location: "eu-central-1"
    cache::bucket_name: "our-cache-bucket"
    cache::shared: "true"
    cache::type: "s3"
    
    machine::idle_nodes: "0"
    machine::idle_time: "1800"
    machine::max_builds: "10"
    machine::machine_name: "standard-%s"
    
    machine::option::access_key: "%{hiera('ops::gitlab::spotrunner::id')}"
    machine::option::ami: "ami-44d48eaf"
    machine::option::block_minutes: "60"
    machine::option::iam_profile: "gitlab-runner"
    machine::option::instance_type: "m4.xlarge"
    machine::option::private_address_only: "true"
    machine::option::private_address: "true"
    machine::option::region: "eu-central-1"
    machine::option::secret_key: "%{hiera('ops::gitlab::spotrunner::secret')}"
    machine::option::spot_instances: "true"
    machine::option::spot_price: "0.2"
    machine::option::subnet_id: "subnet-subbb"
    machine::option::tags: "stage,prod"
    machine::option::vpc_id: "vpc-veepeecee"
    
    machine::option::other: >
      --machine-machine-options amazonec2-security-group=cognodev3_sg_docker_machine
      --machine-machine-options amazonec2-security-group=cognodev3-SG0-shubdu
      --machine-machine-options amazonec2-security-group=cognodev3-SG1-shalala
      --machine-machine-options amazonec2-security-group=cognodev3-SG2-shubndibndu
      --machine-machine-options engine-insecure-registry=some.internal.repo
      --machine-machine-options engine-insecure-registry=other.internal.repo:5000
    
    #
    # START
    #
    
    ## GITLAB SPOT INSTANCE RUNNER
    
    create::docker_containers:
      # gitlab spot runner
      gitlab-spot-runner:
        image: gitlab/gitlab-runner:latest
        pull_on_start: true
        volumes:
          - /var/docker-apps/gitlab-spot-runner:/etc/gitlab-runner
          - /var/run/docker.sock:/var/run/docker.sock
          - /var/run/.docker:/root/.docker
    
    create::files:
      "/var/docker-apps/gitlab-spot-runner/config.toml.puppet":
        ensure: present
        notify: "Service[docker-gitlab-spot-runner]"
        content: |
          concurrent = %{hiera('global::concurrent')}
          check_interval = 0
    
    create::execs:
      "delete config file":
        command: rm /etc/gitlab-runner/config.toml
        path: /bin:/usr/bin:/sbin:/usr/sbin
        refreshonly: true
        subscribe: File[/etc/gitlab-runner/config.toml.puppet]
        before: Docker::Exec[register-spot-runner]
    
    # why are we doing this?
    # because gitlab WANTS to re-write the config file. and we CANNOT set "global"
    # parameters (e.g. "log_level", "concurrent") in using the registration
    # command line.
    # so, we ...
    #    * create a config "config.toml.puppet" file with ONLY global params
    #    * rm the config.toml file in case of changes to the .puppet file
    #    * re-execute registration using ALL other config settings when the
    #      config.toml file is no longer present
    # we do this because:
    #    * we can't watch the toml file for changes, cause the runner WILL change
    #      it
    #    * but we WANT to set global parameters, and luckily the runner seems
    #      to just append all non-global settings to an existing config file
    #      on registration.
    # THIS FUCKING SUCKS. I know. but I really have not found another way (abk)
    
    create::docker_execs:
      "register-spot-runner":
        detach: false
        container: gitlab-spot-runner
        tty: true
        command: >-
          /bin/bash -c 'cp /etc/gitlab-runner/config.toml.puppet /etc/gitlab-runner/config.toml &&
          gitlab-runner register --non-interactive
          --registration-token %{hiera('registration_command::token')}
          --url %{hiera('registration_command::url')}
          --executor "docker+machine"
          --docker-image %{hiera('registration_command::docker_image')}
          --locked=false
          --run-untagged
          --docker-volumes /var/run/docker.sock:/var/run/docker.sock
          --name %{hiera('runners::name')}
          --limit %{hiera('runners::limit')}
          --request-concurrency %{hiera('runners::concurrency')}
          --cache-cache-shared=%{hiera('cache::shared')}
          --cache-s3-bucket-location %{hiera('cache::bucket_location')}
          --cache-s3-bucket-name %{hiera('cache::bucket_name')}
          --cache-type %{hiera('cache::type')}
          --machine-machine-driver amazonec2
          --machine-idle-nodes %{hiera('machine::idle_nodes')}
          --machine-idle-time  %{hiera('machine::idle_time')}
          --machine-machine-name %{hiera('machine::machine_name')}
          --machine-max-builds %{hiera('machine::max_builds')}
          --machine-machine-options amazonec2-private-address-only=%{hiera('machine::option::private_address_only')}
          --machine-machine-options amazonec2-use-private-address=%{hiera('machine::option::private_address')}
          --machine-machine-options amazonec2-region=%{hiera('machine::option::region')}
          --machine-machine-options amazonec2-access-key=%{hiera('machine::option::access_key')}
          --machine-machine-options amazonec2-ami=%{hiera('machine::option::ami')}
          --machine-machine-options amazonec2-block-duration-minutes=%{hiera('machine::option::block_minutes')}
          --machine-machine-options amazonec2-iam-instance-profile=%{hiera('machine::option::iam_profile')}
          --machine-machine-options amazonec2-instance-type=%{hiera('machine::option::instance_type')}
          --machine-machine-options amazonec2-request-spot-instance=%{hiera('machine::option::spot_instances')}
          --machine-machine-options amazonec2-secret-key=%{hiera('machine::option::secret_key')}
          --machine-machine-options amazonec2-spot-price=%{hiera('machine::option::spot_price')}
          --machine-machine-options amazonec2-subnet-id=%{hiera('machine::option::subnet_id')}
          --machine-machine-options amazonec2-tags=%{hiera('machine::option::tags')}
          --machine-machine-options amazonec2-vpc-id=%{hiera('machine::option::vpc_id')}
          %{hiera('machine::option::other')}'
        unless: test -f /etc/gitlab-runner/config.toml
        require: Service[docker-gitlab-spot-runner]
    

    Does this look ugly? You bet.

    Should this be a puppet module? Most probably.

    Did I foresee this? Nope.

    Am I completely fed up? Yes.

    Is this stuff I want to do? No.

    Does it work?

    … Yes (at least … 🙂 )

    Remarks

    If you wander what all those create::THING  entries are – it’s this:

    $files = hiera_hash('create::files', {})
    if ! empty($files) {
      create_resources('file', $files)
    }
    

    We have an awful lot of those, cause then we can do a lot of stuff in the config YAMLs and don’t need to go in puppet DSL code.

  • Install Arch with full disk encryption, btrfs and EFI

    Updates:

    • 2022-06-23 | some minor corrections, added wifi link
    • 2018-03-27 | fixed a typo in the HOOKS documentation, clarified kernel boot parameters

    Introduction

    I recently had to re-install my beloved Arch Linux. For security I need (and use) full disk encryption. This is a cheatsheet for the whole procedure, because although the Arch Linux Wiki is excellent, it is also huge and sometimes you must pick your stuff together from many pages.

    This is what I am doing here 🙂

    NOTE: Usually you only have to follow the one subsection I link to!

    Overview

    One after another, we will do the following steps

    • Download and prepare Arch USB stick (skipped, you should know that 😉
    • Prepare the hard disk
    • Prepare the disk partitions
    • Add LVM “inside” the crypted partition
    • Create filesystems & mount partitions
    • Install arch
    • Configure boot manager

    Prepare the hard disk

    Use parted to init the disk and …

    1. init the disk using a GPT partitioning scheme, then create
    2. a GPT boot partition and put 100% of the remaining space in another partition (the first two actions behind the link)

    Prepare the disk partitions

    Basically,

    1. use the cryptsetup command to encrypt the main (big) partition,
    2. and create a file system on the boot partition (remember: it must be FAT32 for EFI boot, and it must be _un_encrypted!)

    Add an LVM “inside” the encrypted partition

    Cause we want “properly” encrypted swap (you can also encrypt swap using a /dev/random key every time, but then you will not persist data between reboots and you can’t do things like suspend-to-disk), we need at least two “partitions” “inside” the crypted volume. Sounds like LVM on LUKS? It does. We already used it 🙂 .

    1. Create LVM partitions inside the encrypted volume (Don’t forget to use cryptsetup luksOpen before, usually in step 1 in the last section 🙂

    NOTE: Do not follow the above link down to “prepare the boot partition”, cause they use ext2 and we need FAT32 for EFI boot partitions. Just don’t.

    I use the name “secure” for the VG, and I use btrfs cause I am so incredibly elite, and so we don’t need to set a specific size for the / and /home “partitions” and can just use btrfs subvolumes, while still being able to wipe the system without the home directories. That’s pretty neat if you need it (I never did, but now I can ;). So that’s the final setup:

    /dev/mapper/secure-swap    40 GB, swap
    /dev/mapper/secure-system  rest, btrfs with 2 subvols: root & home
    

    Create filesystems & mount partitions

    Of course, Arch has already a wiki page section for that. I did it 3 times in a different way until I found it and had to do it again. So here is my summary.

    # CREATE BTRFS & SUBVOLUMES
    $ mkfs.btrfs /dev/mapper/secure-system
    $ mount /dev/mapper/secure-system /mnt
    $ btrfs subvolume create /mnt/@
    $ btrfs subvolume create /mnt/@home
    $ btrfs subvolume create /mnt/@snapshots
    $ umount /mnt
    
    # MOUNT PARTITIONS
    $ mount -o subvol=@ /dev/mapper/crypted-system /mnt
    $ mkdir -p /mnt/home /mnt/boot
    $ mount -o subvol=@home /dev/mapper/crypted-system /mnt/home
    $ mount /dev/sda1 /mnt/boot
    

    NOTE: /boot is not on an encrypted partition 😉 , and the leading “@” is a convention for subvolumes which should be mounted somewhere. I also don’t use compress=...  parameters, cause I don’t need / want transparent compression.

    Install arch

    Set up networking

    Nowadays nobody uses LAN cables any more. And of course, with Arch you can do it over WiFi as well. This is the short form:

    $ iwctl
    [iwd] station list
    # get the name of your "station" here
    [iwd] station wlan0 scan
    [iwd] station wlan0 get-networks
    # see the list of networks
    [iwd] station wlan0 connect NETWORK_NAME
    

    Also useful: IWD docs, connecting to the internet on the arch Wiki.

    Install base system

    Then you follow up with the usual installation procedure, but you stop at the “Initramfs” section. Here we will pick up again. In the chroot, this is what is needed and useful. (Yes, we’re installing multiple network managers, Linux “is about choice” …)

    pacman -S lvm2 vim \
              iwd netctl dialog wpa_supplicant \
              networkmanager \
              dhcclient \
              udev nano zsh sudo iproute2 net-tools \
              git
    

    Configure boot manager & boot files

    We are using systemd-boot. Or bootctl, as the binary is called. It should be already installed. The procedure is also outlined here. We also enable TRIM support, it seems to lessen security, but it raises SSD performance and life time.

    1. First, check if your system EFI is all right.
    2. Optionally install the Intel microcode updater package if you have an Intel CPU by doing pacman -S intel-ucode.
    3. Then run … bootctl -path=/boot install to install systemd-boot.
      (If you ran into this error File system ... has wrong type for EFI System Partition, then you forgot set 1 esp on on your boot partition in parted during partitioning)

    Now create/modify the files below. Remember: /mnt/boot should be a mounted directory, and since you’re in a chroot this should be /boot for you.

    FILE: /boot/loader/entries/arch.conf

    title Arch Linux
    linux /vmlinuz-linux
    initrd /intel-ucode.img       # ONLY FOR INTEL CPUs!!
    initrd /initramfs-linux.img
    options luks.uuid=FS_UUID root=/dev/mapper/secure-system rootflags=subvol=@ rd.luks.options=discard
    

    Some hints:

    • use blkid to get the UUID
    • Note that the FS_UUID is the UUID of the *encrypted luks partition* (/dev/sda2 or similar), and not the filesystem within!
    • use a mouse to copy-paste the UUID\
    • gpm -m /dev/input/mice -t imps2; you may have to disable vim’s mouse support using set mouse= and set ttymouse=
    • the list of normal and dm-crypt related kernel parameters … well, is also in the Arch wiki.

    FILE: /boot/loader/loader.conf

    default arch    # the file above without .conf extension, can have wildcards!!
    timeout 2
    editor  0
    

    FILE: /etc/mkinitcpio.conf

    # Just MODIFY that file, to be precisely this line:
    HOOKS=(base systemd autodetect modconf keyboard sd-vconsole block sd-encrypt sd-lvm2 filesystems fsck)
    

    The key idea is to use the “systemd” parameters instead of the “normal” ones. The full list of hooks is of course also available, and the order is important.

    Install boot manager

    Now execute:

    mkinitcpio -p linux
    

    If you run into some vmlinuz-linux - file not found issues, just re-install linux and intel-ucode while making sure /boot is mounted.

    Reboot

    We should be done here 🙂 …

    … but we’re paranoid:

    • did you install lvm2? (if not – install it and run mkinitcpio again)
    • did you install iwd? (if not – no wifi in the final system)
    • did you set a root password? (if not, set it)

    Then you can safely …

    $ reboot
    

    Further reading 😉

  • Elastic Beanstalk with Docker using Terraform

    I just investigate AWS Elastic Beanstalk. And I want to use terraform for this. This is what I’ve done, and how I’ve got it running. I basically do this because the docs for this are either super-long (and are still missing critical points) or super-short (and are also missing critical points), at least what I’ve found.

    This should get you up and running in very little time. You can also get all the code from a demo github repository.

    General principles

    The Architectural Overview is a good page to read to get an idea of what you’re about to do. It’s not that long.

    In short, Elastic Beanstalk runs a version of an application in an environment. So the process is: Declaring an application, defining a couple of versions and environments, and then combine one specific version with one specific environment of an app to create an actually running deployment.

    The environment is just a set of hosts configured in a special way (autoscaling & triggers, subnets, roles, etc.), whereas the application version is the info about how to deploy the containers on that environment (ports, env variables, etc.). Naturally, you think of having a DEV environment which runs “latest”, and a PROD environment which runs “stable” or so. Go crazy.

    Prerequisites & Preparation

    For the example here you need a couple of things & facts:

    • An AWS account
    • In that account, you need:
    • an S3 bucket to save your app versions
    • a VPC ID
    • subnet IDs for the instance networks
    • an IAM roles for the hosts
    • an IAM service roles elastic beanstalk. (see bottom for how to create that)
    • Terraform 🙂
    • The aws command line client

    Get started

    The files in the repository have way more parameters, but this is the basic set which should get you running (I tried once, then added all that stuff). The main.tf  file below will create the application and an environment associated with it.

    # file: main.tf
    
    resource "aws_elastic_beanstalk_application" "test" {
      name        = "ebs-test"
      description = "Test of beanstalk deployment"
    }
    
    resource "aws_elastic_beanstalk_environment" "test_env" {
      name                = "ebs-test-env"
      application         = "ebs-test"
      cname_prefix        = "mytest"
    
      # the next line IS NOT RANDOM, see "final notes" at the bottom
      solution_stack_name = "64bit Amazon Linux 2016.09 v2.5.2 running Docker 1.12.6"
    
      # There are a LOT of settings, see here for the basic list:
      # https://is.gd/vfB51g
      # This should be the minimally required set for Docker.
    
      setting {
        namespace = "aws:ec2:vpc"
        name      = "VPCId"
        value     = "${var.vpc_id}"
      }
      setting {
        namespace = "aws:ec2:vpc"
        name      = "Subnets"
        value     = "${join(",", var.subnets)}"
      }
      setting {
        namespace = "aws:autoscaling:launchconfiguration"
        name      = "IamInstanceProfile"
        value     = "${var.instance_role}"
      }
      setting {
        namespace = "aws:elasticbeanstalk:environment"
        name      = "ServiceRole"
        value     = "${var.ebs_service_role}"
      }
    
    }
    

    If you run this, at least one host and one ELB should appear in the defined subnets. Still, this is an empty environment, there’s no app running in it. If if you ask yourself, “where’s the version he talked about?” – well, it’s not in there. We didn’t create one yet. This is just the very basic platform you need to run a version of an app.

    In my source repo you can now just use the script app_config_create_and_upload.sh , followed by deploy.sh . You should be able to figure out how to use them, and they should work out of the box. But we’re here to explain, so this is what happens behind the scenes if you do this:

    1. create a file “Dockerrun.aws.json ” with the information about the service (Docker image, etc.) to deploy
    2. upload that file into an S3 bucket, packed into a ZIP file (see “final notes” below)
    3. tell Elastic Beanstalk to create a new app version using the info from that file (on S3)

    That obviously was app_config_create_and_upload.sh . The next script, deploy.sh , does this:

    1. tell EBS to actually deploy that configuration using the AWS cli.

    This is the Dockerrun.aws.json  file which describes our single-container test application:

    {
      "AWSEBDockerrunVersion": "1",
      "Image": {
        "Name": "flypenguin/test:latest",
        "Update": "true"
      },
      "Ports": [
        {
          "ContainerPort": "5000"
        }
      ],
      "Volumes": [],
      "Logging": "/var/log/flypenguin-test"
    }
    

    See “final notes” for the “ContainerPort” directive.

    I also guess you know how to upload a file to S3, so I’ll skip that. If not, look in the script. The Terraform declaration to add the version to Elastic Beanstalk looks like this: (if you used my script, a file called app_version_<VERSION>.tf  was created for you automatically with pretty much this content):

    # define elastic beanstalk app version "latest"
    resource "aws_elastic_beanstalk_application_version" "latest" {
      name        = "latest"
      application = "${aws_elastic_beanstalk_application.test_app.name}"
      description = "Version latest of app ${aws_elastic_beanstalk_application.test_app.name}"
      bucket      = "my-test-bucket-for-ebs"
      key         = "latest.zip"
    }
    

    Finally, deploying this using the AWS cli:

    $ aws elasticbeanstalk update-environment \
      --application-name test-app \
      --version-label latest \
      --environment-name test-env
    

    All done correctly, this should be it, and you should be able to access your app now under your configured address.

    Wrap up & reasoning

    My repo works, at least for me (I hope for you as well). I did not yet figure out the autoscaling, for which I didn’t have time. I will catch up in a 2nd blog post once I figured that out. First tests gave pretty weird results 🙂 .

    The reason why I did this (when I have Rancher available for me) is the auto-scaling, and the host-management. I don’t need to manage any more hosts and Docker versions and Rancher deployments just to deploy a super-simle, CPU-intensive, scaling production workload, which relies on very stable (even pretty conservative) components in that way. Also I learned something.

    Finally, after reading a lot of postings and way to much AWS docs, I am surprised how easy this thing actually is. It certainly doesnt look that way if you start reading up on it. I tried to catch the essence of the whole process in that blog post.

    Final notes & troubleshooting

    1. I have no idea what the aws_elastic_beanstalk_configuration_template  Terraform resource is for. I would like to understand it, but the documentation is rather … sparse.
    2. The solution stack name has semantic meaning. You must set something that AWS understands. This can be found out by using the following command: $ aws elasticbeanstalk list-available-solution-stacks ** ** … or on the AWS documentation. Whatever is to your liking.
    3. If you don’t specify a security group (aws:autoscaling:launchconfiguration  – “SecurityGroups “) one will be created for you automatically. That might not be convenient because this means that on “terraform destroy” this group might not be destroyed automatically. (which is just a guess, I didn’t test this)
    4. The same goes for the auto scaling group scaling rules.
    5. When trying the minimal example, be extra careful when you can’t access the service after everything is there. The standard settings seem to be: Same subnet for ELB and hosts (obviously), and public ELB (with public IPv4 address). Now, placing a public-facing ELB into an internal-only subnet does not work, right? 🙂
    6. The ZIP file: According to the docs you can only upload the JSON file (or the Dockerfile file if you build the container in the process) to S3. But the docs are not extremely clear, and Terraform did not mention this. So I am using ZIPs which works just fine.
    7. The ContainerPort is always the port the applications listens on in the container, it is not the port which is opened to the outside. That always seems to be 80 (at least for single-container deployments)

    Appendix I: Create ServiceRole IAM role

    For some reason on the first test run this did not seem to be necessary. On all subsequent runs it was, though. This is the way to create this. Sorry that I couldn’t figure out how to do this with Terraform.

    • open AWS IAM console
    • click “Create new role”
    • Step 1 – select role type: choose “AWS service role”, and under that “AWS Elastic Beanstalk”
    • Step 2 – establish trust: is skipped by the wizard after this
    • Step 3 – Attach policy: Check both policies in the table (should be “AWSElasticBeanstalkEnhancedHealth”, and “AWSElasticBeanstalkService”)
    • Step 4 – Set role name and review: Enter a role name (e.g. “aws-elasticbeanstalk-service-role”), and hit “Create role”

    Now you can use (if you chose that name) “aws-elasticbeanstalk-service-role” as your ServiceRole parameter.

    Appendix II: Sources

  • My take at a CI infrastructure, Pt.3

    All right, back again. Much text here. Let’s talk about …

    Containerizing The Binaries

    We are done with the build, now we have a binary. I went for something simple: Who knows best how to put this into a container? The dev guy. Cause he knows what he needs, where he needs it, and where it can be found after the build.

    But containerizing it should be not hard, given a moderately complex software with a couple of well thought-of build scripts. So I went for this:

    /my_code/
       |--- docker/               # !!!
       |      |--- prepare.sh     # !!! optional
       |      |--- Dockerfile     # !!! required ;)
       |--- main.c
       |--- SELECT_BUILD_CONTAINER
       |--- build/                # !!! created by the build
              |--- ...            # !!!
    

    Now it get’s straightforward: The build scripts in TeamCity …

    • look for the docker directory, change into it,
    • execute the “prepare.sh” script if found,
    • build a container from the Dockerfile,
    • tag the container and
    • push it into the registry (which is configured centrally in TeamCity)

    Tagging the containers

    A docker cotainer is referenced like this:

    some/thing:and_a_tag
    

    How do we choose how to name the container we just built? Two versions.

    For projects which contain nothing but a Dockerfile (which we have, cause our build containers are also versioned, of course), I enforce this combination:

    Repository name: docker-one-two
    ... will yield:  one/two:1234abc9-321 (as container repo/name:tag)
    

    The build script enforces the scheme “docker-one-two”, and takes “one” and “two” automatically as names for the container. Then “1234abc9” is the git commit id (short), and “321” is the build number.

    Why not only the git commit ID? Because between builds, the same result is not guaranteed if executing the build again. If you build a container, and the execution contains an “apt-get update”, two builds a week apart will not result in the same contents.

    For “simple” or “pure” code builds I use the following scheme:

    Repository name: some-thing
    ... will yield:  some/thing:1234abc9
    

    Same reasoning.

    In both cases a container “some/thing:latest” is also tagged and pushed.

    Now when we run a software container, we can see

    • with which container it was built (by looking at “SET_BUILD_CONTAINER”),
    • which base container was used to build the software container (by looking at “docker/Dockerfile”)
    • and we can do this cause we know the git commit ID.

    For each base container (or “pure” Dockerfile projects), we extend this with a build number.

    Done.

    So this is my state so far. If anyone reads this, I would be interested in comments or feedback.

  • My take at a CI infrastructure, Pt.2

    For CI I want the classics – a check in (push) to the repo should be catched by TeamCity, and trigger …

    • a build of the artifact, once
    • running of unit tests
    • containerizing the artifact
    • uploading it to a private Docker registry

    The question was: How?

    This post deals with building the code.

    Building Code

    When I build code I am faced with a simple question: Which library versions do I use?

    When I have multiple projects, the question becomes complex. Which version do I install on which build agent? How do I assign build tasks to agents? What if some software cannot be installed? How can I do a rollback? Or try with another lib version quickly?

    The solution: Build containers. I am sure I have read about it somewhere, this is in no part an invention of my own, but I just can’t find an article explaining it.

    It basically goes like this. We have a docker container, which contains all necessary build libs in their development form and the build tools to build something. We pull the container, mount our checked out code dir in the container, and run the build in the controlled environment of it. We want a different set of libs? We re-build the container with them, and use the other container to build the project. Doesn’t work? Go back to the previous one.

    The prerequisite of this is a build process that does not change, or at least does not change for a set of projects. We use CMake, so it’s the same build commands over and over: “cmake .”, “make”, “make test”. That’s it. My first working build container looks like this:

    FROM 10.10.10.11:5000/runner/boost:9a443273-2
    MAINTAINER Fly Penguin <fly@flypenguin.de>
    RUN \
         dnf -y update && dnf -y upgrade \
      && dnf -y install cmake make gcc-c++ boost-test boost-devel \
      && dnf clean all \
      && mkdir /build
    WORKDIR /build
    

    Building the code now is super easy:

    git clone ssh://... my_code
    cd my_code
    docker run --rm -v $(pwd):/build builder/boost:1234 cmake .
    docker run --rm -v $(pwd):/build builder/boost:1234 make
    docker run --rm -v $(pwd):/build builder/boost:1234 make test
    

    Done.

    … or? One question remains: How do I select the build container?

    There are two possibilities: In the build system configuration (read: TeamCity), or in the code. I went for the code. The reason is pretty simple: I check out a specific revision of the code, I know which container it was built with. From there I can work my way up:

    ./mycode
       |--- main.c
       |--- SET_BUILD_CONTAINER
    

    Guess what’s in “SET_BUILD_CONTAINER”? Correct. Something like this:

    my_registry_url:5000/builder/boost:abcdef98-210
    

    The build configuration in TeamCity reads the file, and acts accordingly. Later I will talk more on those tags, and in the next post I talk about containerizing the binaries.

  • My take at a CI infrastructure, Pt.1

    … so far.

    It might be crappy, but I’ll share it, cause it’s working. (Well, today it started doing this 😉 ). But enough preamble, let’s jump in.

    The Situation

    I am in a new project. Those people have nothing but a deadline, and when I say nothing I mean it. Not even code. They asked me what I would do, and I said “go cloud, use everything you can from other people, so you don’t have to do it, and you stay in tune with the rest of the universe” (read: avoid NIH syndrome). They agreed, and hired me.

    The Starting Point

    They really want the JetBrains toolchain, the devs use CLion. They also want YouTrack for ticketing (which doesn’t blow my mind so far, but it’s ok). Naturally they want to use TeamCity, which is the Jenkins alternative from JetBrains, and pretty all right from what I can see so far.

    The code is probably 95%+ C++, and creates a stateless REST endpoint in the cloud (but load balanced). That’s a really simple setup to start with, just perfect.

    Source code hosting was initially planned to be either inhouse or in the bought cloud, not with a hoster. Up to now they were using git, but without graphical frontend which involved manual creation (by the – part time – admin) of every git repo.

    The Cloud Environment

    That’s just practical stuff now, and has nothing – yet – to do with CI/CD. Skip it if you’re just interested in that. Read it if you want to read my brain.

    I looked around for full-stack hosted CI/CD systems, notably found only Shippable, and thought that they don’t fully match the requirements (even when we move source code hosting out). So I went to AWS, and tried ElasticBeanstalk. This is quite cool, unfortunately scaling takes about 3-5 minutes for the new host to come up (tested with my little load dummy tool in a simple setup, which I actually didn’t save, which was stupid).

    Anyway, before deploying services CI (the compilation & build stuff) must work. So my first goal was to to get something up and running ASAP, and thats bold and capitalized. Fully automated of course.

    For any kubernetes/CoreOS/… layout I lack the experience to make it available quickly, and – really – all the AWS “click here to deploy” images of those tools didn’t work out-of-the-box. So I started fairly conventional with a simple CloudFormation template spawning three hosts: TeamCity server, TeamCity agent, Docker registry, and – really important – GitLab. Since then GitLab was replaced by a paid GitHub account, all the better.

    Setting the hosts up I used Puppet (oh wonder, being a Puppet “Expert”). Most of the time went in writing a TeamCity puppet module. A quirk is that the agents must download their ZIP distribution image from a running master only, which is kinda annoying to do right in puppet. For now TeamCity is also set up conventionally (without docker), which I might change soon, at least for the server. The postgres database runs in a container, though, which is super-super simple to set up (please donate a bit if you use it, even 1€ / 1$ helps, that guy did a great job!). Same went for gitlab (same guy), and redis (again). I also used the anti-pattern of configuring the hosts based on their IP addresses.

    I also wanted to automate host bootstrapping, so I did this in the cloudformation template for each host. The archive downloaded in this script contains 3 more scripts – a distribution-dependent one which is called first, have a look to see details. Basically it’s just a way to download a snapshot of our current puppet setup (encrypted), and initialize it so puppet can take over. I also use “at” in those scripts to perform a reboot and an action after, which is highly convenient.

    CI (finally)

    … in the next post 😉

  • Congstar

    Seit heute morgen bin ich bei Congstar, gewechselt von O2 (bzw. discoPlus) weil mir dort die Gespräche doch recht häufig abbrachen. Sah immer lustig aus – man schaut aufs Telefon, sieht 5 Balken, dann plötzlich “Suche”, dann baut er wieder auf, und man bewegt sich dabei keinen Meter. Das fand ich nicht soo spannend, also ging ich zurück zum Altvater D1.

    Congstar allerdings gibt sich beste Mühe, einen nicht so besonderen ersten Eindruck zu machen. Ich lege die SIM-Karte ein, und bekomme erst mal “SIM gesperrt” angezeigt. Aha. Leider haben die mir keinen PIN geschickt. Ich also auf Verdacht ins online Portal, in dem ich meine PIN tatsächlich heraussuchen konnte. Eingegeben, ok. Dann bemerke ich das Fehlen eines Betreiberlogos, bzw. einfach jeglicher Betreiberinfos in der Kopfzeile. Dachte mir “das wird schon”, und fuhr zur Arbeit. Dort bekam ich nach ca. 1h gegen 9:45h eine email, ich könne jetzt meine PIN auf der Congstar-Seite abrufen. Aha. Ja, danke. Ich nehme das zum Anlass und google mal nach Betreiberlogo und Congstar.

    Was ich da finde ist wenig überzeugend. Congstar verwendet offenbar fehlerhafte SIM-Karten, und das schon seit 2011, und angeblich ist dieser Zustand seit April 2012 nicht mehr aktuell. Naja. Congstar-Hilfe sagt, aus “technischen Gründen” sei die Anzeige auf einem iPhone nicht möglich, und die in Foren propagierte Lösung ist, sich eine Nano-SIM mit Micro-SIM-Adapter zu besorgen.

    Das geht besser.