Blog

  • Syntax highlighting with wordpress

    This is just a test for syntax highlighting. Which I really really really wanted to have. Even if it’s WordPress and not something cool like hugo.

    So, let’s try:

    import random
    
    class RndTest:
        def __init__(self):
            print("Oy! 'this is python!")
            self.rnd_seed = random.random()
    
        @classmethod
        def do_nothing(cls, nothing):
            print("Doing {} now ;)".format(nothing))
    

    That doesn’t look so bad, right?

    How to do this

    • install the crayon syntax highlight plugin
    • when writing posts, your toolbar will have a new icon looking like this: <>
    • press it, and an “add code” dialog will open
    • do your thing
    • save
    • done

    Like.

    Dislikes

    • I don’t know which JS engine this thing uses (if any public one in particular)
    • I like highlight.js

    (So, none really)

    Alternative plugins (untested)

    To be honest, the only real contender in installation base and features seems to be Syntax Highlighter Evolved. I have not tried it, but if you don’t like crayon, that looks like the one to go.

  • PyCharm, Arch linux & Python 3.6

    Love Python. Love PyCharm. Love Arch Linux.

    Unfortunately Arch sneakily updated Python to 3.6. Cool, new version … but hey, why don’t my debug runs in PyCharm work any more??

    ImportError: libpython3.5m.so.1.0: cannot open shared object file: No such file or directory
    

    Yup, pretty confusing. It seems unable to find shared python 3.5 library. Well. After some cursing, turns out the solution is pretty simple (if you know what to do):

    • get pyenv
    • use pyenv to install Python 3.5.2, but with -enable-shared option set
    • use this python version for PyCharm projects (it does not matter if it’s in a virtualenv or not)

    Like this:

    $ PYTHON_CONFIGURE_OPTS="--enable-shared" pyenv install 3.5.2
    [...]
    $ sudo $HOME/.pyenv/versions/3.5.2/bin/python "/opt/pycharm-professional/helpers/pydev/setup_cython.py" build_ext --inplace
    [...]
    $ _
    

    That solved it for me 🙂

    References:

  • Logs with docker and logstash

    It would be nice to have all container logs from a docker cluster sent to … let’s say, an ELK stack. Right?

    Right.

    So we did:

    • on each host in the cluster, we use the GELF log driver to send all logs to a logstash instance
    • the logstash instance clones each request using type “ELK”
    • to the “ELK” clone, it adds the token for the external ELK service
    • the “ELK” clone goes out to the external ELK cluster
    • the original event goes to S3.

    Here’s how.

    Some thoughts about choosing GELF over the others

    Logstash sees a stream of lines. When the data is sent to it, logstash gets a lot of different data types, depending what software runs in the containers. So to filter out a container / service / instance in Kibana, we need at least the container image name to say “give me the logs of this service type”, and then we don’t even separate by different stages.

    GELF gives us this information out-of-the-box:

    {
           "source_host" => "10...",
                 "level" => 6,
               "created" => "2017-01-09T13:41:06.039364628Z",
               "message" => "This is da log!",
               "version" => "1.1",
               "command" => "./run.sh",
                  "tags" => [],
            "image_name" => "hub/repo/image",
            "@timestamp" => 2017-01-12T11:56:34.395Z,
        "container_name" => "ze-container",
                  "host" => "ip-10-9-8-7",
              "@version" => "1",
                   "tag" => "",
              "image_id" => "sha256:...",
          "container_id" => "..."
    }
    

    This is a lot of information what is useful later.

    Compared to that, syslog looks rather bleak (all according to the examples on the docker pages):

    Aug  7 18:33:19 HOSTNAME docker/hello-world/foobar/5790672ab6a0[9103]: Hello from Docker.
    

    Yes, you can tag that, but you also have to. Not with GELF. Also it’s already beautifully structured in fields, whereas with syslog you’d probably have to agree on a scheme and deconstruct later.

    Over to fluentd:

    2015-09-01 15:10:40 -0600 docker.3fd8678d487e: \
        {"source":"stdout","log":"Hello Fluentd!",\
         "container_id":"3fd8678d487e540c7a303e1613101e746c5012f3317434eda93f24351c1928f7",\
         "container_name":"/angry_kalam"}
    

    This is … not so helpful. Especially the container name and the container ID are super useless, because there’s no way I can get the image name information out of it. You might be able to tag accordingly, but the same now applies as with syslog (except here we already have a document structure it seems). I would have liked to use fluentd, because there’s a low-resource agent on each host, and we don’t need a central collector (i.e. logstash) for lossy UDP traffic. But that made me choose GELF for the first try.

    Cloudwatch now only logs into buckets, which is a big bunch of text. If you want to separate you have to create a cloudwatch bucket for everything, so pretty much one for every dimension (host, container name, …). Either I have not fully understood this, or this is really really useless.

    Now, the story

    (Disclaimer: I am fairly new to the whole ELK ecosystem, so this is all based in my potentially limited knowledge, and might be wrong in places)

    We committed ourselves to just use JSON formatted log output for our log messages. Now, not every program is without flaws, so what we usually have is a couple of stack traces mixed with the output, which are also usually multi-line (read: multiline events in ELK speak).

    So one of my biggest requirements was: To parse the JSON logs as JSON when I have one, and to re-assemble several distinct log messages which form a multi-line event into one.

    The JSON-messages are not a problem. Check whether something starts and stops with a curly brace, and you’re good to go. And it’s always one single line anyway.

    The multiline messages though … . From logstash perspective, there’s just a stream of lines. For each line the information of the container is present, but for logstash that’s just dumb metadata without any meaning. So imagine this sequence of events:

    EVENT 0: CONTAINER_1_HOST_1 JSON-MESSAGE-LINE
    EVENT 1: CONTAINER_2_HOST_2 JSON-MESSAGE-LINE
    EVENT 2: CONTAINER_3_HOST_1 MULTILINE LOG - LINE 0
    EVENT 3: CONTAINER_4_HOST_3 JSON-MESSAGE-LINE
    EVENT 4: CONTAINER_1_HOST_1 MULTILINE LOG - LINE 0
    

    If I naively use the multiline codec like this:

    input {
      stdin {
        codec => multiline {
          pattern => "^\s"
          what => "previous"
        }
      }
    }
    

    I guess that would not work. Why? Because either Event 4 gets appended to the line of Event 3, which is wrong, or (I have no clue how the codecs work) to Event 2, which is equally wrong (different container source).

    Now, the solution to use the GELF input with a multiline codec does not seem to work, because there is a bug in logstash which prevents usage of codecs in the GELF input. Luckily there’s a workaround using the multiline input filter of logstash, outside of the plugin. Fortunately there’s an input plugin we can use, called multiline (yes, just like the filter plugin), which seems to be working. Let’s try this. Unfortunately this plugin is no longer bundled with Logstash 5.x. (Sucks? Yes.) It was “replaced” in favor of the multiline codec, which reads like “deprecated” to me, although I get the motivation. But it makes me feel weird using it. (Sucks even more? Yes.)

    To add insult to injury I deploy logstash using Docker, and the Docker image now does not have this plugin – so I have to build my own logstash image. I don’t like to repeat myself, so I built a logstash image which can dynamically install plugins. Adds ages to startup time, but if I ever have another plugin I need I don’t need to rebuild the image, just restart.

    [ Our Logstash dynamic plugin docker container on quay.io ]

    Our test-config for now, which seems to be working well so far (couple of test runs only), is:

    input { gelf {} }
    
    filter {
    
      # if we have json, let's use it.
      if [message] =~ /^{.*}$/ {
        json {
          source => 'message'
          target => 'data'
        }
    
        mutate {
          remove_field => 'message'
        }
      }
    
      multiline {
        pattern => '^\s'
        what => 'previous'
        stream_identity => "%{container_id}"
      }
    
      # let's clone and add the token field. the ORIGINAL input goes to S3,
      # the CLONED input with the token field goes to logz.io
    
      clone {
        clones => [ "one" ]
        add_field => { "token" => "asdf" }
      }
    
    }
    
    output { # ... }
    

    That works somewhat well. All in all, I am pretty pleased after the whole thing, because once you have overcome the obstacles of the logstash config language, plugins, docker configuration, etc., it is running pretty smoothly.

    Now, I still don’t like this solution for the following reasons:

    • Apparently a huge performance impact if we do this, but this is IMHO the only real solution to the problem – except doing crappy stuff and then maintaining it.
    • It might be that the fluentd-based system is more robust (no single point of failure on my side) and better fitting for the task (multiline, no lossy UDP, which might be a problem in some use cases).
    • Now even if I could use the codec instead of the filter, it does not come with a “stream_identity” parameter. Whether you don’t need it any more (then how does it do it?!) or it went without replacement I don’t know.
    • I have to scale up (anyways) – but I do not have any idea about UDP package loss and resource requirements on the logstash side yet, and when something happens logs will be lost. This is rather unfortunate.
    • Java stack traces are fine. Python and Go stack traces not so much – they contain non-indented lines within the body of the stack trace, so the “starts with whitespace? add to last line” approach does not work. And I have no idea for other approaches to be honest.
    • Changing logstash configs promises to be a pain – because it’s central component, so doing this without logs getting lost you seem to need to …
    • have multiple logstash instances, load-balanced using IP round robin probably, with at least one more than you need for the full load
    • Take one of those instances out of the round-robin
    • Wait until traffic is exactly down to zero (which might take time), …
    • adjust the rules, …
    • test somehow (takes quite a while because of logstash start times, and if you have to test multiple times this is quite annoying) …
    • and save.
    • Then re-add the instance-IP to the IP pool, …
    • … and repeat for all the rest.

    I hope I am doing a couple of things “wrong”, because as long as it runs it runs fine, but changes are not so agile in this description. I still might check out fluentd in more detail, because if that workflow is needed fluentd might be a bit more flexible.

    But all in all a really great first start.
  • Logstash, clone filter & add_field mysteries

    That’s a really great piece of documentation. This does not work:

    # let's clone each event, one goes to somewhere, one goes to somewhere else.
    # note this was copy-pasted from the docs!
    # see here: https://is.gd/QSHNps
    # again. THIS DOES NOT WORK.
    filter {
      clone {
        add_field => { "token" => "ABCDEF" }
      }
    }
    output {
      if [token] {
        # go somewhere
        tcp { ... }
      } else {
        # go to somewhere else
        s3 { ... }
      }
    }
    

    Why? Because the clone filter will not clone anything. And the documentation is super unclear on this. If you know it, you can read it – if you don’t know this, you’ll … google.

    For it to actually clone anything you have to specify the ‘clones => [“one”, …]’ parameter. Then it will clone, and add the token field as expected. Like this:

    filter {
      clone {
        clones => ["logz"]     # NOW it will clone.
        add_field => { "token" => "ABCDEF" }
      }
    }
    

    Interestingly the “clones =>” parameter is optional, which just confuses the shit out of me.

    The reasoning that I don’t just add the field altogether is that this is the access token for our externally hosted ELK service. This should only be there for the external path, and not be put in S3 in parallel.

    References:
    • https://logstash.jira.com/browse/LOGSTASH-2144
  • Quick puppet debugging snippet for Atom

    Not sure how I could have lived without this Atom snippet expansion until now (had it before in Sublime, never bothered porting, stooooopid as I realize now 😉 ):

    '.source.puppet':
      'Puppet: fail inline template':
        'prefix': 'fit'
        'body': """
          $fail_me = inline_template('<%= require "yaml"; YAML.dump(@$1) %>')
          fail("\\\\n\\\\nVariable \\\\$$1:\\\\n\${fail_me}\\\\n\\\\n")
        """
    
  • Testing logstash configs with Docker

    Now this is really not rocket science, but since I might do this more often, I don’t want to google every time.

    Prepare your directories

    ./tmp                   # THIS IS YOUR WORKING DIRECTORY
      |- patterns/          # optional
      |   |- patternfile1   # optional
      |   |- patternfile2   # optional
      |- logs.log
      |- logstash.conf
    

    Prepare your logstash config

    # logstash.conf
    input {
      file {
        path => '/stash/logs.log'
      }
    }
    
    filter {
      # whatever config you want to test
      grok {
        match        => [ "message", "%{WHATEVER}" ]
        patterns_dir => '/stash/patterns'              # optional :)
      }
    }
    
    output {
      stdout { codec => rubydebug }
    }
    

    Run logstash

    docker run --rm -ti -v $(pwd):/stash logstash logstash -f /stash/logstash.conf
    

    Done.

    Done. 🙂

  • Loathing RSpec and Puppet

    There are words for how much I hate RSpec (especially RSpec-Puppet), but they would be too harsh to write down.

    So now that I don’t have to google the same shit over and over again, here’s what you have to do to get basic puppet module testing up and running (replace $MODULE with your module name, of course):

    $MODULE/Rakefile

    require 'rubygems'
    require 'puppetlabs_spec_helper/rake_tasks'
    

    $MODULE/.fixtures.yml

    fixtures:
      repositories:
        concat:
      git://github.com/puppetlabs/puppetlabs-concat.git
      # alternate method, for specifying refs
        stdlib:
      repo: git://github.com/puppetlabs/puppetlabs-stdlib.git
      ref: 1.0.0
      symlinks:
      # do _not_ forget this
        $MODULE: "#{source_dir}"
    

    $MODULE/spec/spec_helper.rb

    require 'rubygems'
    require 'puppetlabs_spec_helper/module_spec_helper'
    

    $MODULE/spec/classes/$MODULE_spec.rb

    # see also http://rspec-puppet.com/
    require 'spec_helper'
    
    describe '$MODULE' do
      context 'default' do
        it {
          should contain_file('/etc/haproxy/haproxy.conf')
        }
    
        # or ...
        it do
          is_expected.to contain_file('/this/syntax/is/even/more/retarded')
        end
      end
    end
    

    Final note

    It’s “rake spec”, not “rake test”. Of course.

  • TeamCity LDAP authentication with JumpCloud

    JumpCloud looks like a great service to use LDAP without using LDAP. And I have just managed to find an error in the documentation, precisely the file “ldap-config.properties.dist”.

    The working configuration is:

    # basic jumpcloud url
    java.naming.provider.url=ldap://ldap.jumpcloud.com:389/
    
    # search user for jumpcloud
    java.naming.security.principal=uid=BIND_USER_NAME,ou=Users,o=ORG_ID,dc=jumpcloud,dc=com
    java.naming.security.credentials=BIND_USER_PASSWORD
    
    # unix ldap seems to use uid as username - see https://is.gd/dBPegr
    teamcity.users.login.filter=(uid=$capturedLogin$)
    teamcity.users.username=uid
    teamcity.users.base=ou=Users,o=ORG_ID,dc=jumpcloud,dc=com
    

    Seems to work nicely, now comes the finetuning.

  • Migrate Rancher database from container to external

    I wanted to switch from an in-container database setup to an external database setup. And I didn’t know what happens when you just lose all database contents, and I thought with Docker and some tweaking that should also not be necessary. So I just migrated the databases. Here’s what I did for those interested:

    • stop rancher
    • use a container (sameersbn/mysql) to mount the rancher database content and do a mysqldump
    • import the dump into the external database (AWS RDS instance)
    • start rancher up with different parameters (use external database, as described in the official docs)

    And now the actual command lines:

    # create socket directory
    $ cd RANCHER_MYSQL_MOUNT
    $ mkdir sockets
    
    # start sameersbn/mysql to have a mysql container for dumping everything
    $ docker run -d --name temp-mysql -v $(pwd)/sockets:/var/run/mysqld -v $(pwd):/var/lib/mysql sameersbn/mysql
    
    # dump the database
    $ mysqldump -S ./sockets/mysqld.sock --add-drop-database --add-drop-table --add-drop-trigger --routines --triggers cattle > cattle.sql
    
    # restore the database in AWS / whatever
    $ mysql -u USERNAME -p -h DB_HOST DB_NAME < cattle.sq
    

    (Don’t forget to stop the sammersbn container once you’re done). I have configured puppet to start rancher. The final configuration in puppet looks like this:

    ::docker::run { 'rancher-master':
      image   => 'rancher/server',
      ports   => "${rancher_port}:8080",
      volumes => [],
      env     =>  [
        "CATTLE_DB_CATTLE_MYSQL_HOST=${db_host}",
        "CATTLE_DB_CATTLE_MYSQL_NAME=${db_name}",
        "CATTLE_DB_CATTLE_MYSQL_PORT=${db_port}",
        "CATTLE_DB_CATTLE_MYSQL_USERNAME=${db_user}",
        "CATTLE_DB_CATTLE_MYSQL_PASSWORD=${db_pass}",
      ],
    }
    

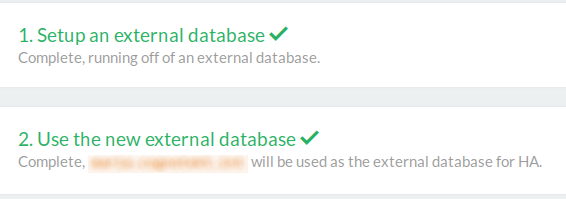
    Restart, and it seems to be working just fine. To check go to http://RANCHER_URL/admin/ha (yes, we still use HTTP internally, it will change), and you should see this:

    setup screen

    Nice.

  • Ansible inventory file from Consul

    Quick self-reminder:

    curl consul.domain:8500/v1/catalog/nodes | jq '.[]|.Address' | tr -d '"'