Tag: mac

  • Mac quick action – edit PDF documents

    I had another Automator / quick action post before: shrink images

    Problem: My health insurance has the stupidest billing letters imaginable, but at least they come as PDF. The 2nd page is the one you want, the first is useful for the letter’s date. Third and fourth pages are just useless.

    Solution: Another OS X Finder Quick Action using Automator, this time based on pdftk. It keeps pages two and one (in this order) and removes the rest.

    Prerequisites: pdftk (brew install pdftk-java)

    In case you don’t speak German:

    • Receive PDF files from Finder (the image shows “all applications” though – if you want you can do that as well)
    • Files come as script arguments

    Here we go. Automator config:
    And the script for copy-pasting.

    export PATH=$PATH:/usr/local/bin
    
    # now we iterate over a script's arguments, not using stdin as file input
    for f in "$@"
    do
        # ONLY NEEDED IF YOU WANT TO KEEP BACKUPS. Since we're modifying PDF
        # file contents, of files that could be important, I'm paranoid.
        BASE=${f%.*}
        EXT=${f##*.}
        ORIG_FILE="$BASE.orig.$EXT"
        COUNT=0
        while [ -f "$ORIG_FILE" ] ; do
            COUNT=$(($COUNT + 1))
            ORIG_FILE="$BASE.orig.$COUNT.$EXT"
        done
        # HERE IS THE MAGIC.
        # you need pdftk installed (brew install pdftk - probably)
        mv "$f" "$ORIG_FILE"
        pdftk A="$ORIG_FILE" cat A2 A1 output "$f"
    done
    
  • Mac quick action – shrink images

    Problem: A list of images, which are big. And one wants to make them smaller, maybe for the web.

    Solution: A Mac Automator quick action.

    Prerequisites: GNU parallel, ImageMagick (both via homebrew)

    You …

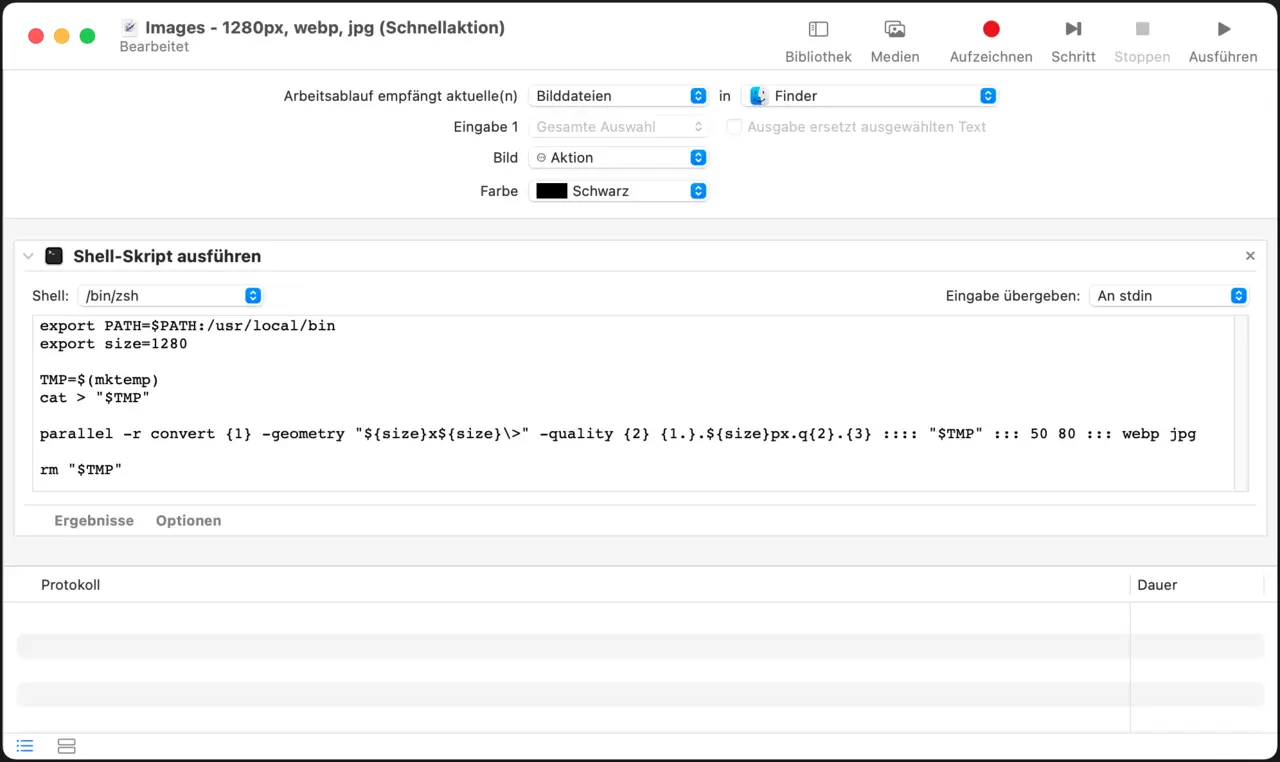
    • open Automator
    • create a new quick action
    • add Shell script action
    • paste in the script below
    • make sure arguments are passed via stdin

    automator quick action for shrinking images

    export PATH=$PATH:/usr/local/bin
    export size=1280
    
    # that SHOULD work, but DOES NOT (at least not on my machine)
    #parallel -a - convert {1} -resize "${size}x${size}\>" -quality {2} {1.}.${size}px.{2}.{3} ::: 50 80 ::: webp jpg
    
    # that works.
    TMP=$(mktemp)
    cat > "$TMP"
    parallel -r convert {1} -geometry "${size}x${size}\>" -quality {2} {1.}.${size}px.q{2}.{3} :::: "$TMP" ::: 50 80 ::: webp jpg
    rm "$TMP"
    

    … or use the easier to understand, non-parallel version:

    export PATH=$PATH:/usr/local/bin
    export size=1280
    
    while read f ; do
      for ext in webp jpg ; do
        for q in 50 80 ; do
          convert "$f" -resize ${size}x${size} -quality $q "${f%.*}.$size.q$q.$ext"
        done
      done
    done
    
  • Location of Mac “Quick Actions”

    I created a “quick action” with Automator on my Mac. Once saved, there are a few ways you can find them:

    • “Open” in Automator, then choose “quick actions” in the “type” dropdown
    • Look in $HOME/Library/Services

    That’s about it.

  • Convert RAW files on a Mac using “sips”

    I recently needed to convert Canon *.CR2 RAW files to JPEG. What I did not know is that a Mac brings all you need preinstalled in form of a CLI tool called sips.

    for i in *.CR2; do
      sips -s format jpeg $i --out "${i%.*}.jpg"
    done
    

    Also: man sips works just fine for more information.

    Source: Coderwall

  • Install “legacy” brew on M1 apple silicon

    I tried installing homebrew for about 3 days following the completely identical howto postings out there (i.e. “prefix with ‘arch -x86_64′”). Alas, it didn’t work:

    $ arch -x86_64 /bin/bash -c "$(curl -fsSL https://raw.githubusercontent.com/Homebrew/install/master/install.sh)"
    Password:
    Homebrew is not (yet) supported on ARM processors!
    Rerun the Homebrew installer under Rosetta 2.
    If you really know what you are doing and are prepared for a very broken
    experience you can use another installation option for installing on ARM:
      https://docs.brew.sh/Installation
    

    The other recommendation (run the whole terminal under Rosetta2, scroll down to “Running a special flavor […]”) also did not work.

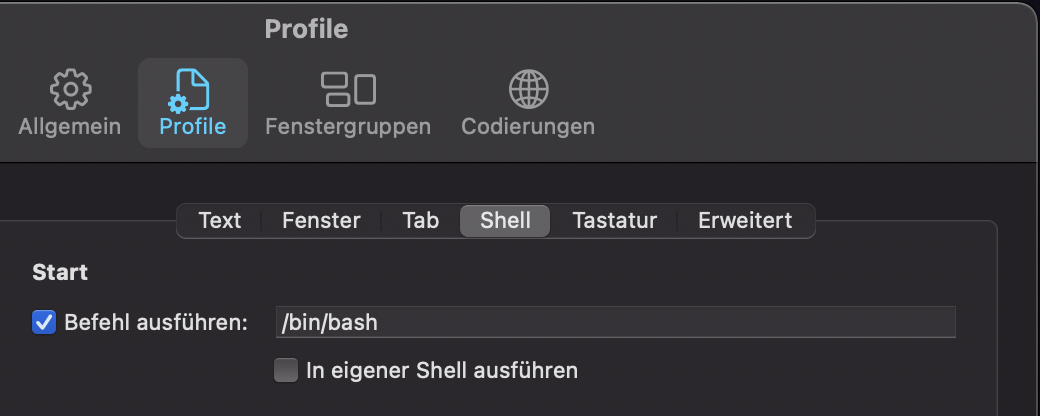
    What did finally work though was changing my login shell to /bin/bash instead of the default zsh for the time being:

    item-settings

    Maybe that helps someone.

    The “install the M1 version” process described by Noah Peters (thanks, really!) did work on the first try.

  • Install flutter on MacOS

    I blog so I don’t forget … this:

    First, the non-CLI actions:

    • install XCode from the App Store
    • install Flutter plugin for Visual Studio Code (if you haven’t installed VS Code, do it now, you can also use “brew” for that)
    • download the latest Flutter SDK, unzip it, and move the unzipped flutter/ folder to $HOME/Dev/frameworks (or any other location you favor)
    • add $HOME/Dev/flutter/bin and $HOME/Dev/flutter/bin/.pub-cache/bin to your path

    That’s about it for now. Then do some CLI magic:

    brew tap dart-lang/dart
    brew install dart android-studio android-sdk
    sudo gem install cocoapods
    pod setup
    sudo xcode-select --switch /Applications/Xcode.app/Contents/Developer
    sudo xcodebuild -runFirstLaunch
    flutter doctor --android-licenses
    

    After that some more UI stuff:

    • Start Android Studio. It will want to install a couple of things (Intel drivers pop up, weirdly)

    And finally: A final flutter doctor will tell you if everything is all right.

    The whole process will download about 10-12 GB of data.

  • Mac three finger gestures in browsers

    Well, I love my three-finger-jump-to-top gesture in Firefox. It was gone.

    It took me about 2h to get it back by googling. And I blog so I don’t forget.

    Here’s where I should look next time straight away: System setting – Trackpad – rightmost tab – first setting.

    osx system settings for three finger swipes

  • NAS Performance & Mac

    Ich bin stolzer Besitzer eines Synology NAS. Das hängt mit meinem Mac an einem Gigabit-Ethernet, und funktioniert ziemlich gut. Große Dateien bekomme ich mit Transferraten von +- 100 MB/sec rüber.

    Aber.

    Möchte ich von meinem Mac aus eine Netzwerkfreigabe im Finder browsen – dann dauert das listen von Verzeichnissen SEKUNDEN. Anzeigen von JPGs (kleinen!) in der Vorschau auch gerne mal 10-20 davon.

    Abhilfe schafften nach langem googlen folgende Erste-Hilfe-Maßnahmen im Terminal:

    defaults write com.apple.desktopservices DSDontWriteNetworkStores true<br />
    sudo sysctl -w net.inet.tcp.delayed_ack=0<br />
    

    … und seitdem flutscht’s 😀